Sunday 31 December 2017

A little bit of rubbing down and painting today on a few more of the steering components, lazy day.


I visited John yesterday and borrowed his reamers along with gaining a new backplate, phew.  Reaming the bushes was an enjoyable activity although not a fast one.  The kingpin now fits well and so I proceeded to give the suspension components another clean before coating them in metal ready and painting them with POR15.  An enjoyable day.


In-between coats of paint I got out the bearings for the hub and realise that they are not symmetrical meaning they need to go in a certain way, naturally I don't know which way.  The annoying thing is that I could have asked John had I realised before today, oh well.  Edit: having just read the manual I realise that the bearings are marked; must read the manual, must read the manual, must re,......

Friday 22 December 2017


I discovered that I had been over zealous in my strip down of the back plate by removing the snail shaped brake shoe adjusters.  They were locked solid so I thought nothing of doing it but when I went to order the parts I realised that they are part of the backplate and not sold separately which means I need a new plate, damn.  Fortunately John has one, phew.  I'll be a little more careful with the other side.  The slave cylinders were knackered and need replacing with is a shame as that is about £120 instead of a £10 repair kit, oh well.


I turned my attention to the flange on the bottom, or rear of the overdrive.  It had been under pressure from the puller for a week but was not moving so I got the oxy-actylene out and it gave way.  A quick clean up and the new seal went in.  I am worried that it may have gone in too far though and it certainly sits much deeper that the original.  Part of my thinks it'll be alright and part of me is thinking that when oil starts dripping from the rear of the gearbox I'll be really annoyed at the job of removing the gearbox jet to change it.  I may change it later on but for now I have dispelled negative thoughts from my mind.


Having finished the overdrive I set about connecting it back to the gearbox which was fiddly but did eventually work.


The unit all back together and waiting patiently for the engine,...


Next up was the replacement of the bushes.  I took advice off another Healey owner and placed the bushes in the freezer overnight but by the time I actually got it lined up and calmed I suspect that the bush had warmed up.  Anyway it went in, yippee.


Having got the bushes in I turned to the hub and striped out the bearings and bushes before giving it a clean up.


Been somewhat tardy on updating the blog but I have been in the garage.  We had a few days of heavy snow two weeks ago and the bikes that had to be stored outside so that I can move around looked a little sad.


I started work on the stub axel and created an elaborate puller using an 8mm threaded bar and some suitably sized sockets.


However, all I achieved was a stripped bar and sore hands so I reverted to more basic methods using a hacksaw and a big hammer and punch.  This was much more effective.


With the bushes removed I turned my attention to cleaning up some of the components.  Before and after:


Saturday 9 December 2017

The socket arrived via eBay during the week and I set about the hub.  I greatly enjoyed doing this strip down.


I took the wishbone apart after this photo was taken and am now left with just the bearings to remove.  Then I will clean the lot up and paint it all.  In an ideal world I would finish this side, put it all back together and then start the other side but I can't do that.  This is because I need to hire the reamer from Ahead 4 Healey's at £10/day meaning that I need to have both sides ready at the same time, oh well.

Tomorrow I want to strip the brake backplate down then clean up the metal sections and paint them.  Although as I type this I realise I need to remove the king pin bushes and replace them before I do that.  Decisions, decisions.

Prior to doing all of this I used my other new socket to take the nut off the rear of the overdrive unit so that I can remove the flange and replace that oil seal.  I got the nut off but could I remove the flange?  No, I couldn't.  As I type now the thing is under compression from my weak and ineffective puller.  I'm tempted to use some heat on it but I don't want to risk damaging any bearings etc. in the process.  I've seem this being done on a video on youtube and it looked easy enough, just whack it with a hammer and off it comes.  Well I hit it and I hit it hard yet nothing, hasn't budged an inch.  I decided to leave this and return tomorrow as sometimes these things are simpler second time round.


Sunday 3 December 2017

Fresh job, rebuild the front suspension and king pin unit.  Started by taking lots of photos and by protecting the other bots that need to stay dust free such as the gearbox.


The first real challenge I came to was the dust cap. 


A little look on youtube and I found a chap with an MGB who showed me the way I'm about to highlight to you.  You take two nuts of 5/16 size and a bolt to match screw the nuts on and the the bolt and then just level out with a pair of pliers, very simple in real life.


Then I got to another socket issue: Why is it that every time I pick up a piece of this car I need to buy new equipment?


A fairly gentle morning in the garage.  I received the new cotter pin from John, thank you, but not the socket I'd ordered which was disappointing.  I fitted the gearbox cover plates and the finished the gearbox which was nice.


I also modified the overdrive solenoid plate so that I could mount the locking nut below the bracket and therefore allow more movement for adjustment.  That went well.


Then I made the 'special tool' used by a few Healey people on youtube to hold the oil pump plunger in to allow the box to fit together.


It is time to move on to something else and I think it will be front suspension which has been lying on the floor for the last few weeks.  Before I start I think I'll take some pictures, for once.


Sunday 26 November 2017


So, having started to post videos on Instagram (@luegolover) I thought I should start putting them on here too.


Another very chilly but beautiful morning in sunny London and the heater is on again.

Started by removing the pin that holds this leaver on the shaft that works on the solenoid switch for the overdrive.  I found it tricky to get a punch of the right size so used an old allen key thing that is part of a cheap socket set I never use and it worked a treat.  I replaced the oil seal and bashed the pin back.  I always wonder with this type of think if I have hit it hard enough and as I never do anything like this I have no real idea, oh well, if it fall off then I'll know.


Next was the spring and tube that sit behind the solenoid mounting plate.  I decided to grease the gasket rather than use a sealing compound.  I had gone to great lengths to make sure the surfaces are flat and burr free so I think it should be ok.


I got it all together which is good.  At this point I realised that I had no bolts or washers etc. left over which was really quite good.  Actually I am one spring washer short and there is the outside possibility that it is lurking around somewhere inside the unit but I doubt it.


I then went to install this switch, which I think is to turn the overdrive off if reverse is selected,  only to realise that I didn't have a spanner of the correct size.  I found a spanner that was just a little too small in a collection of old spanners given to me ages ago and took it to the grinder, great fun.


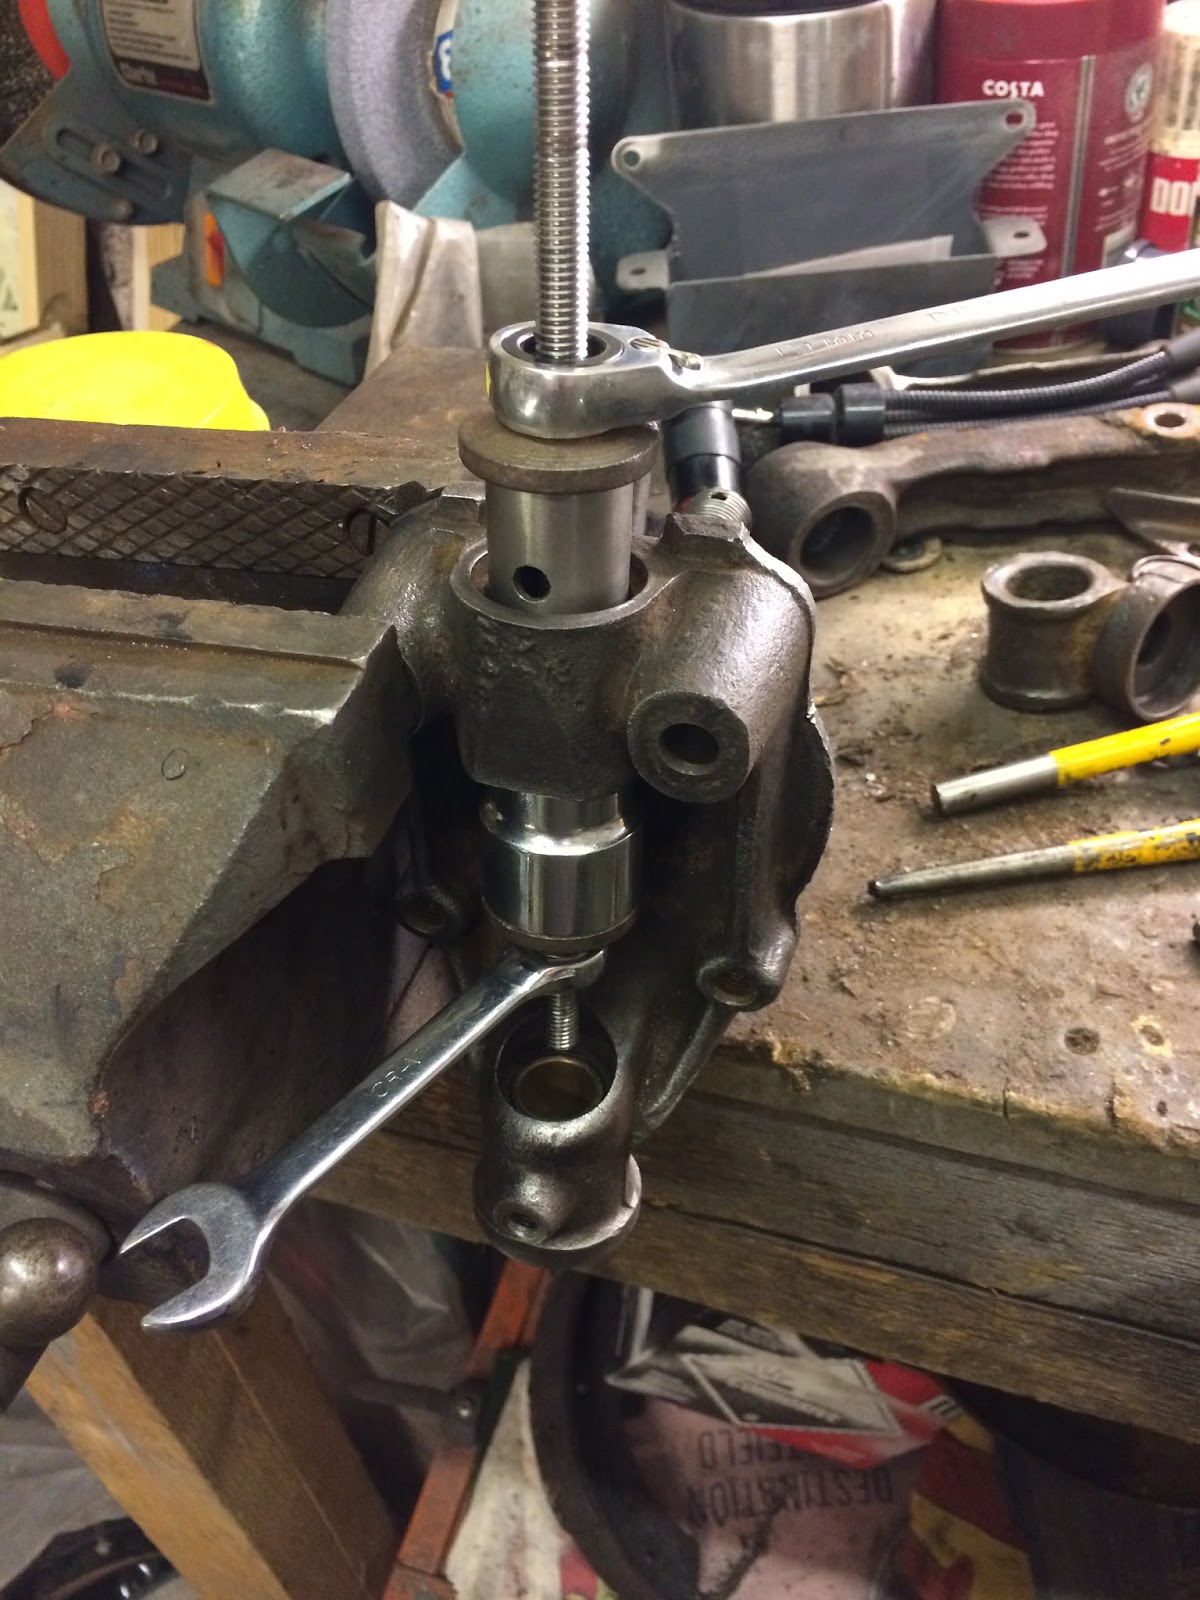
Having had an email conversation with John of Healey 100 register fame about the damaged cotter pin I have decided to take the bottom of the threaded lug off so that I can mount the locking nut below the lug and therefore make more space for a decent amount of adjustment.  I think next weeks pictures will explain that better than I have just managed to.


Saturday 25 November 2017


A lovely and bright but very cold London day today so I put the heaters on in the garage before a small sausage sandwich  breakfast; a man needs energy for a days work!

I managed to get the the gear selector on after a bit of fiddling.  I also fitted the parts that I had painted black before I turned my attention to the side cover and all the bolts that that secure it.


The cotter pin for the gear lever adapter was pretty damaged which is a shame as I could have ordered one of those a while back had I known, oh well.


I laid out the gaskets for the side covered and realise that they will be fiddly to fit so I decided to leave them for now because I want to be able to fit them all in one go and I won't be able to do that without a new cotter pin.

I then turned my attention to the overdrive and began to sort out the studs that had been extracted by mistake and the general gunk that sat in the bottom of it.


Sunday 12 November 2017

I started to rebuild the gearbox and had to spend a fair bit if time cleaning it.  I was conscious that I have spent a lot of time cleaning this already but it is still pretty grubby.

It was lovely work but I am very nervous about it.


The gearbox is remarkably healthy looking for a 64 year old beast.  That is very pleasing.


I had bought a plate for the gearbox that enables the blanked off 1st gear to work but it seems exactly the same as the original which means I bought the wrong one or that it had already been done as an upgrade, who knows.  This will have to wait until the car is driven.


I enjoyed fitting the double seal and the felt seal as it seemed like a positive step.


However I couldn't get the selector on and decided at that point to take a break.


I tried the new solenoid and it seemed like the plunger was too long, umm,......