Friday 31 May 2019

The filler work is surprisingly enjoyable.  I have memories of being bored out of mind mind whilst rubbing down filler when I worked at Dad's garage 30 odd years ago but I didn't find this dull at all.  I think it might be to do with the car being the apple in my eye at the moment. It might be because I have only done one wing and that by the time I have finished I will be bored again.  I don't know but for now I felt happy enough doing it.  I liked creating the swage line and the rolled edge of the arch.


It might also be down to the filler being easier to rub down or the new blocks being better to use that the small lump I used to use or possibly that the paper doesn't clog up within a few rubs.  I don't know but it is certainly better than I remember.

My next challenge is that I have surprisingly few opportunities to work on the car in the coming months as I am away most weekends between now and the summer when we go away for the month of August.  I could get my head round going in the garage after work but the mess created and the agro in emptying the garage of all the bikes and clutter before I can start work means that the chances of that happening are slim, I must try harder.  The other issue I have is that I need a few parts and I have no money left in the Healey fund which is a challenge.  I'll work something out.  

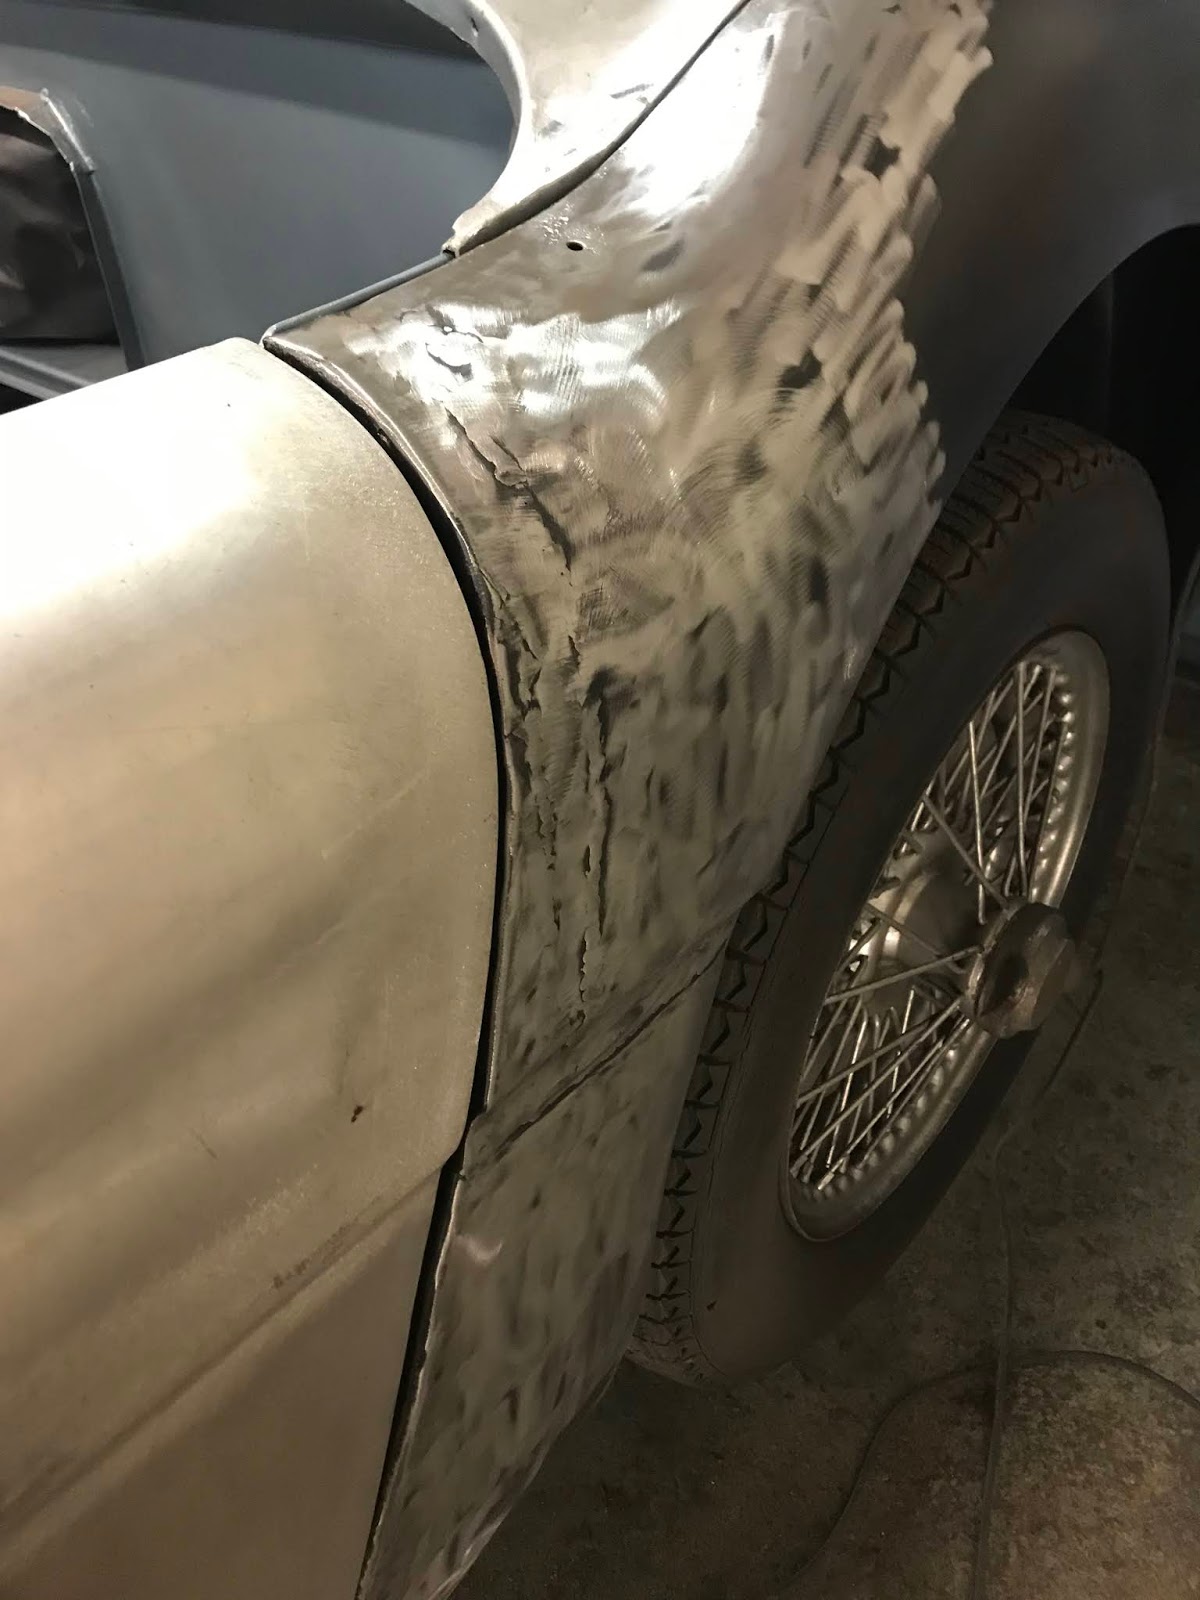
My plan is to do one panel at a time then remove it from the car and prime it before rubbing it down again then removing them again and re-priming and painting the inside in top coat before the final fit prior to painting the car Healey Blue.  This is not the quickest approach but I don't want overspray on the car and I know that I'll get some if I try to paint the panels on the car.

Tuesday 28 May 2019

I started by looking at the door catches as I thought I had a solution for the poor catching which consisted of stripping it down and then adding a shim, ie a washer.  Initially the door closes but can be pulled out by about a cm.


I striped it down and added the first non-rusty washer that fitted that I could find.


The door the other side also improved markedly but isn't quite what it should be so I'll need to play about with the washer thickness at some stage much later down the road.  It is a good step forward.

I then found my fixing kits for the rear wings and discovered that I have 8 counter sunk screws for each side, great stuff.


On to the filler work, I decided I'd start on the passengers side rear wing and work round the car in a systematic way to enable me to get each panel done and then primed before any exposed bare metal could get rusty.  It seemed strange to be removing paint from a panel that had been eCoated.


I picked a section of the car that curves in two different directions as the first part of the car to use for filler for the first time I've used the stuff in 25 years.  Thought I'd rub it down tomorrow.


Monday 27 May 2019

I've had an odd few days in the garage this bank holiday weekend but have managed to get the doors and wings on and am generally pleased with the fit.  It is never going to be a contours car but it should look reasonable.  I've noticed on a few YouTube videos and in particular those by Matthew Randal that I should have some screws down the front overlapping edge of the rear wings to secure it in place which is my next step.  After that I am going to focus on the door catches which do not work well currently, they need stripping down and shimming, at least I hope that is all they need.  I'll post some pictures next time.

Sunday 19 May 2019

I took the panhard rod off, lowered the car on to the ground and decided that I needed to run it up and down the back yard to settle the suspension.  It started after a little while and ran wonderfully.  I really enjoyed driving the car again, I can't wait to get it on the road.


It was also good to see it out with the body on again, I love the look of this car.

I put the wheel with the Michelin XAS tyre on the front near side (left) to see how it fitted and was pleased with the look.


Anyway, the panhard rod made no difference so I jacked it up again and took all the wheels off and measured between the hubs and the distance was within a millimetre so I guess the axel is square and my bodywork not.   So I decided to reshape the lower edges of the wing and whilst I was at it take the driver side door gap out a little.


I made three cuts on one wing and one on the other then got the welder out.


That kind of killed the day and having finished the worst of the wings I headed to the fridge for a beer.  Before I did though I tried the XAS clad wheel in the spare wheel space and was somewhat pleased to see it slide in without any issues.


Next weekend is the start of school half term holidays so I have a week to make some serious progress which is really exciting.  I need to order some rubbing down blocks and paper so that I can get on with the filler work.  Now rubbing down filler is notoriously dull but I am so looking forward to seeing the whole car in primer.  Not sure I'll get that far next week but I'll give it a good go.  I also have to fit the bonnet and boot and I have a nagging feeling that the radiator is still too high which will be a pain if that is the case.  Overall it feels like a good deal of progress made in recent times so I'll worry not about that.

Saturday 18 May 2019

Today I took the springs off, measured them to find that they are symmetrical and refitted them.  It made no difference so I am back to the drawing board.


I also took a spare wheel to a tyre shop along with one of my Michelin XAS tyres and got it fitted.  I am conscious that the current tyres are 165 profile and the ZAS is 170 and therefore a larger diameter tyre.  It looks good but I dare not fit it to see if it works as the current ones don't.

I started thinking about what it could be down to and then started to look back through this blog to see if I had any photos of what it was like before I stripped it all down.  In February 2016 (how long ago!) I fitted the wheels to check the gaps and was pleased that it was central on both sides.  So I am currently working on what it could be.  For sure I am convinced that wings are not in the same place they were previously as the door gap is out on both sides indicating that the wings need to be a little further back at the top.  I am wondering if the rear shroud is in the correct position?  This may help but I not convinced it is the cause.  It also occurred to me that I hadn't fitted the panhard rod back in 2016 and if this was too long that it could be pushing the axel out of line.  I'll remove it tomorrow to see if there is any difference.  If it is not that then I am in for removing the wings and shroud and if that fails then it will be some heavy duty wing reshaping.

It will be a pain to remove all the bodywork but I'll take comfort that the springs came off and went back on mush easier than I remember it doing so before.


Thursday 16 May 2019


Well that task bought back some memories.  It is good to see the car looking like a car again.  The rear wings are surprisingly time consuming and the front wings have a bolt on each side that is near enough impossible to reach which I suspect is going to be left out.

This wasn't without issue though.


Both door gaps at the back are non existent.   More intriguingly the axel is sitting out of line to the bodywork.  Some food for thought.


Monday 6 May 2019

Change of plan.  I kept thinking of the work involved in taking the wings etc on and off to paint when it occurred to me that if I prime and paint the insides today then I will have to mask them up when I do the priming and this will be a pain.  So  have decided to do the priming in one go, ie inside and outside and then do all the painting to colour on the inside at the very end.

Next job then is to fit all the wings and doors (wish I hadn't taken the hinges off now) and get on with the filling.

Sunday 5 May 2019

Another bank holiday and another 3 days on the car, wonderful.  I retrieved the wings from my mother-in-law's loft during the week so planned to get them painted on the inside.  The garage is now really cramped with all the panels back so I left the wings in the garden whilst I was rubbing them down.  Naturally the lovely sunny day produced a short, sharp shower as soon I went back into the garage and they were soaked.  I used the air compressor to dry them off but was rather alarmed by all the nooks and crannies that the water had got into and it started me thinking.  I realised that I should really seal all the joints with Puraflex 40 as I had done the inner body several years back and headed off to buy some.  This kind of wrecked Saturday as it meant that I couldn't do the stone chip that day because the sealer need drying time.  I did get to paint the stone chip on today though so I am hopeful that I can get the wings in colour tomorrow.


Having done that this morning I then got the doors down from the garage wall where they have been hanging for a few years and cleaned then before rubbing them down and sealing.  Over night I decided that I would remove the hinges for painting so marked them up to ensure the same hinges went back in the same position.


I laid the shrouds back on the car to save space essentially and apart from looking like a car again I became conscious that it is going to be very difficult to mask the car to prime them in situ.  This means that I am going to have to take the lot off for priming, oh well.