Sunday, 14 July 2019

Looking back it was plain to see that I wasn't going to get in the garage after work.  I am just so whacked out when I return from work that I haven't got the desire to get in there and amongst it, oh well.

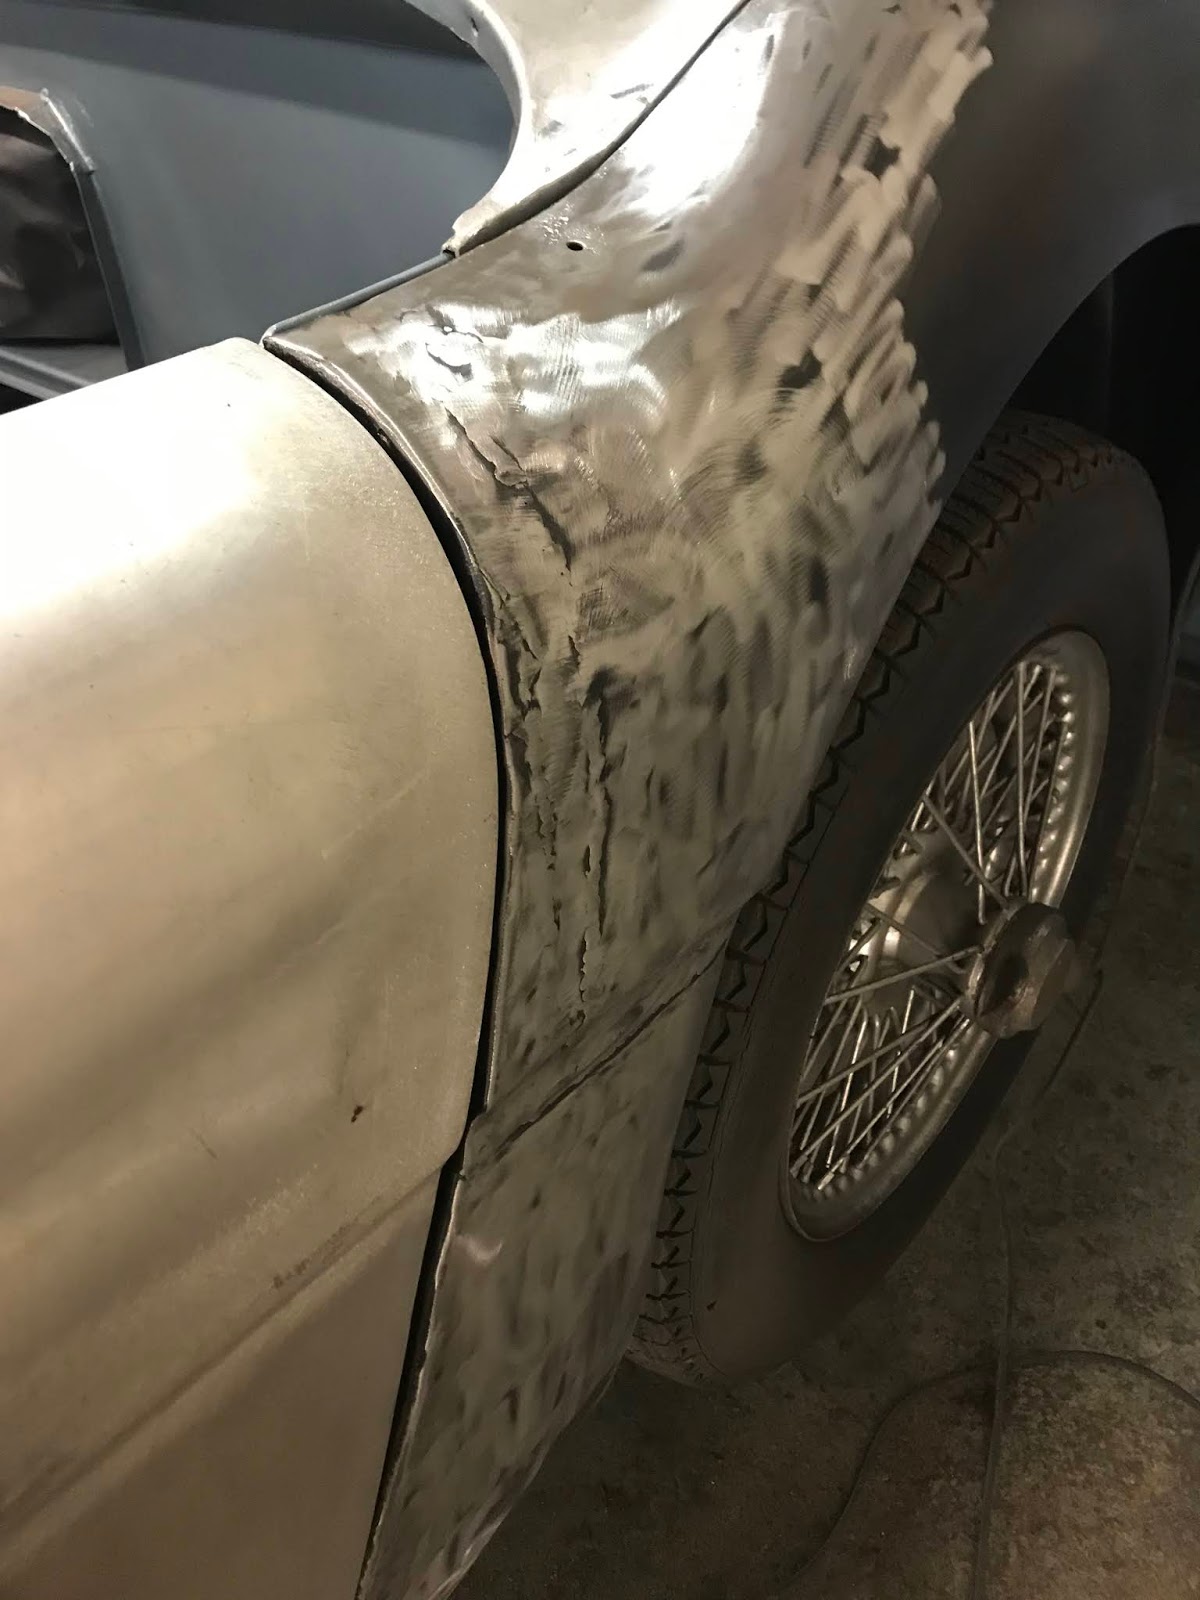
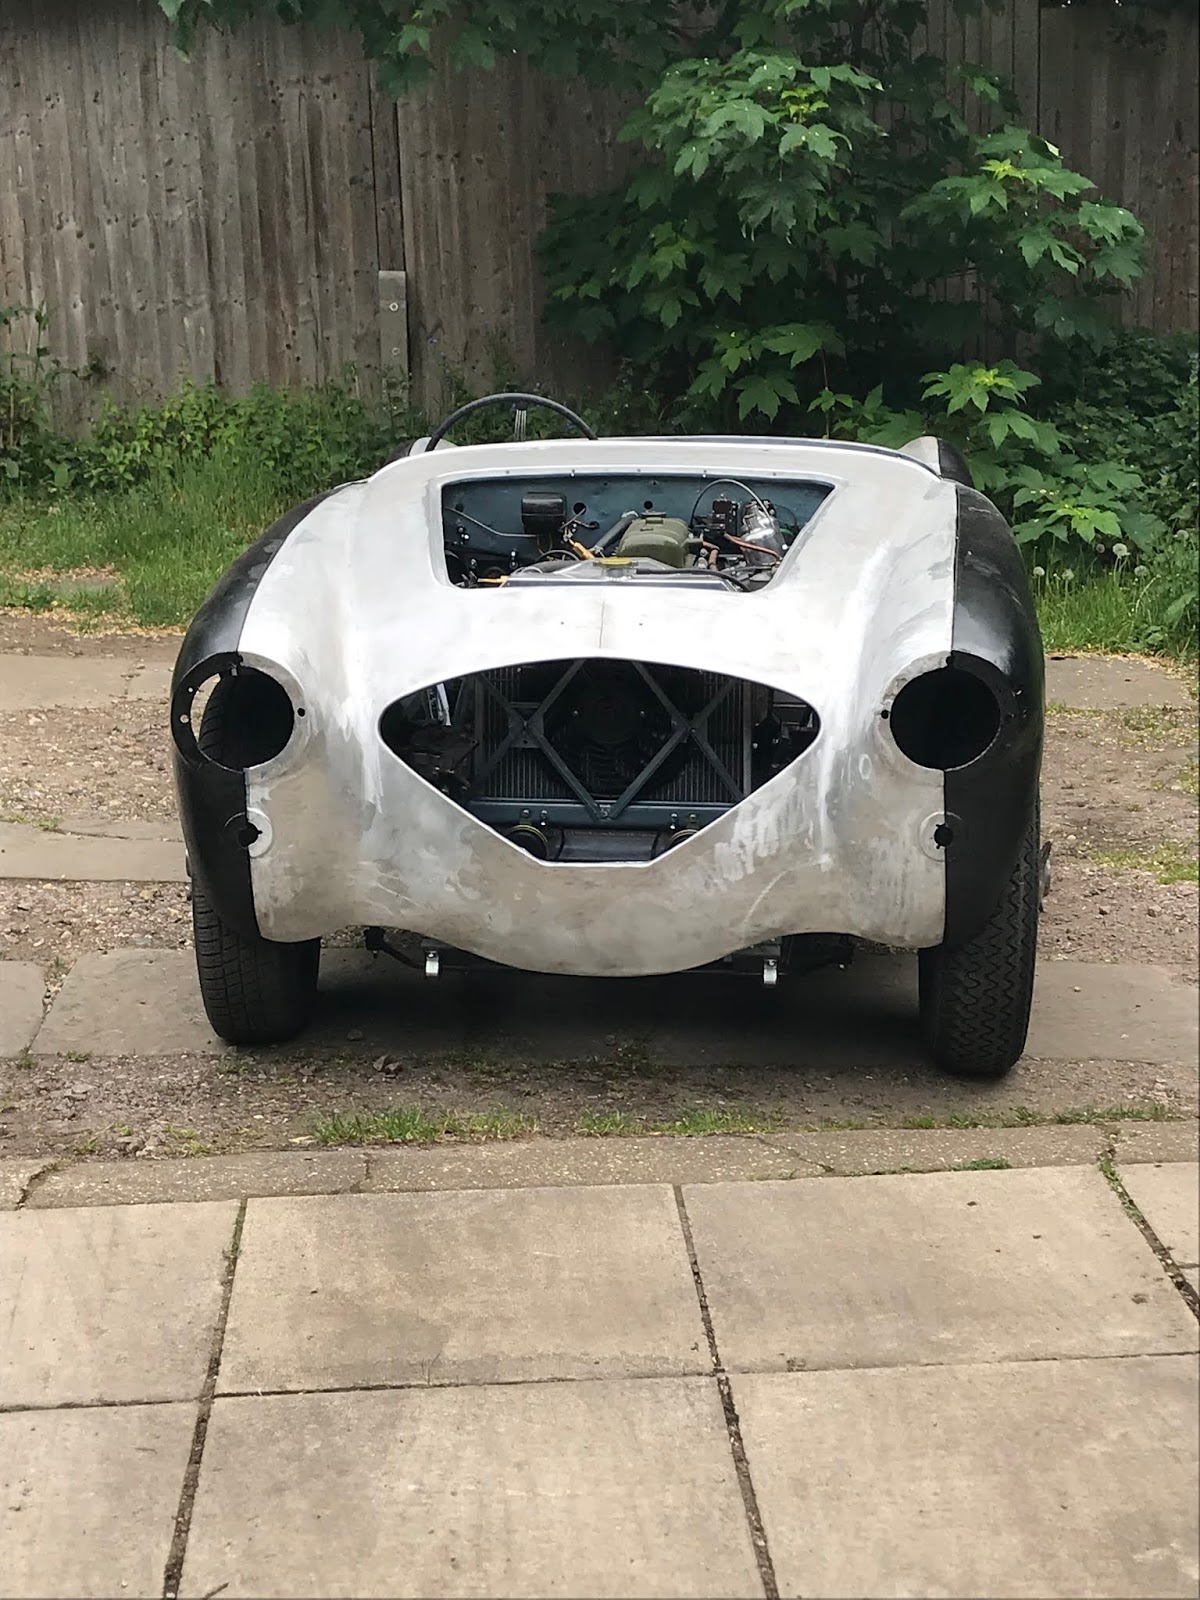
So I was very much looking forward to this weekend when I could get on to the car.  I can't say I worked very hard but I did a fair bit and I loved it.  I loved every minute of it.  The shrouds match the wing tops now with a very small amount of filler and I started along the very rear of the shroud.  With the  boot lid closed the car has now got a fabulous shape.  I am hoping that I can get it in paint during the October half term so I have a deadline and a desire to meet it.

I am now away for the summer, Florida on another house swap, it is a good time of year to be a teacher.  It is also my birthday and I am hopeful that the next batch of parts I need will come my way, fingers crossed.  I need some parts for the windscreen brackets and some other bits like the cockpit trim for the front shroud so my fingers are crossed.

It has been five weeks since I last worked on the car and there was no signs of surface rust on the exposed sections of the wings so I decided that it was probably better not to rush the painting of the wings.  I now plan on priming the rear wings, boot, doors and shroud at the end of August when I next get to see the car.

Happy days.


Tuesday, 11 June 2019

Spent some time working on the rear wings at the weekend; the near side is finished and the off side nearly.  The door gaps are good and the swage lines look lovely from a close vantage point.  I am wondering if I need to get the car off the stands and out so that I can check from a distance but that is for another day.

I then fitted the boot lid, mounted the hinges and installed the lock mechanism.  I realise that I don't have a boot lock and it isn't on my list of parts to acquire so that is a bit of a slip on my part.  I managed to modify a piece of M10 studding to do the job and was pleased with the lock action.  The boot fits surprisingly well.  I did have to work on the shroud to get the gaps a little more consistent and by the end the lid fitted well.  I am rather pleased with it.


My main challenge is that I am now away for every weekend for the next month and will then be away for the summer leaving me little time to work on it.  I would very much like to have the rear end in primer by the time I leave in July which means evening work and so far I have found myself too exhausted after work to get in the garage.  The year 11 students finished their last maths exam yesterday so I am hoping for a little less action at work to enable me to get garage time in the next four weeks; must try harder.

Friday, 7 June 2019

Back at Easter, Moss had an offer on interior trim which included 20% off seat covers.  I had just sold an ISA to settle a credit card bill or two so took the plunge and ordered a set for my 100.  Now I know that the original colour scheme was blue with white piping but I am a mucky sort of chap and thought that the white piping would get a hard time so I opted for blue piping.  I am delighted with them and can't wait to get them on the car.  They came with a note to say that they had been crafted in person by Ana, well thank you Ana, you are a star. I still need to buy the wooden bases, seat foam and a few other bits and pieces in addition to repairing the metal frames so I am a way off doing it but hey, I'm excited already.


It had never occurred to me that I would be able to afford leather seats so I am over the moon.  When I was a kid and had my 65 Midget which I used all through university I loved the seats which were trimmed in read vinyl to match the car colour.  Back then the thought of having leather seats was beyond dreams.

I have often referred to the Swedish restoration website, link below, that has 100's of photos for reference and have looked again at it to see the way they trimmed their seats.  I suspect I may need help so have ask my mother for assistance as she used to upholster sofas back in the day for a hobby, I'm hoping she still has her tools.

http://healeyspecialists.com/restoration-of-the-first-healey-imported-into-sweden/


Friday, 31 May 2019

The filler work is surprisingly enjoyable.  I have memories of being bored out of mind mind whilst rubbing down filler when I worked at Dad's garage 30 odd years ago but I didn't find this dull at all.  I think it might be to do with the car being the apple in my eye at the moment. It might be because I have only done one wing and that by the time I have finished I will be bored again.  I don't know but for now I felt happy enough doing it.  I liked creating the swage line and the rolled edge of the arch.


It might also be down to the filler being easier to rub down or the new blocks being better to use that the small lump I used to use or possibly that the paper doesn't clog up within a few rubs.  I don't know but it is certainly better than I remember.

My next challenge is that I have surprisingly few opportunities to work on the car in the coming months as I am away most weekends between now and the summer when we go away for the month of August.  I could get my head round going in the garage after work but the mess created and the agro in emptying the garage of all the bikes and clutter before I can start work means that the chances of that happening are slim, I must try harder.  The other issue I have is that I need a few parts and I have no money left in the Healey fund which is a challenge.  I'll work something out.  

My plan is to do one panel at a time then remove it from the car and prime it before rubbing it down again then removing them again and re-priming and painting the inside in top coat before the final fit prior to painting the car Healey Blue.  This is not the quickest approach but I don't want overspray on the car and I know that I'll get some if I try to paint the panels on the car.

Tuesday, 28 May 2019

I started by looking at the door catches as I thought I had a solution for the poor catching which consisted of stripping it down and then adding a shim, ie a washer.  Initially the door closes but can be pulled out by about a cm.


I striped it down and added the first non-rusty washer that fitted that I could find.


The door the other side also improved markedly but isn't quite what it should be so I'll need to play about with the washer thickness at some stage much later down the road.  It is a good step forward.

I then found my fixing kits for the rear wings and discovered that I have 8 counter sunk screws for each side, great stuff.


On to the filler work, I decided I'd start on the passengers side rear wing and work round the car in a systematic way to enable me to get each panel done and then primed before any exposed bare metal could get rusty.  It seemed strange to be removing paint from a panel that had been eCoated.


I picked a section of the car that curves in two different directions as the first part of the car to use for filler for the first time I've used the stuff in 25 years.  Thought I'd rub it down tomorrow.


Monday, 27 May 2019

I've had an odd few days in the garage this bank holiday weekend but have managed to get the doors and wings on and am generally pleased with the fit.  It is never going to be a contours car but it should look reasonable.  I've noticed on a few YouTube videos and in particular those by Matthew Randal that I should have some screws down the front overlapping edge of the rear wings to secure it in place which is my next step.  After that I am going to focus on the door catches which do not work well currently, they need stripping down and shimming, at least I hope that is all they need.  I'll post some pictures next time.

Sunday, 19 May 2019

I took the panhard rod off, lowered the car on to the ground and decided that I needed to run it up and down the back yard to settle the suspension.  It started after a little while and ran wonderfully.  I really enjoyed driving the car again, I can't wait to get it on the road.


It was also good to see it out with the body on again, I love the look of this car.

I put the wheel with the Michelin XAS tyre on the front near side (left) to see how it fitted and was pleased with the look.


Anyway, the panhard rod made no difference so I jacked it up again and took all the wheels off and measured between the hubs and the distance was within a millimetre so I guess the axel is square and my bodywork not.   So I decided to reshape the lower edges of the wing and whilst I was at it take the driver side door gap out a little.


I made three cuts on one wing and one on the other then got the welder out.


That kind of killed the day and having finished the worst of the wings I headed to the fridge for a beer.  Before I did though I tried the XAS clad wheel in the spare wheel space and was somewhat pleased to see it slide in without any issues.


Next weekend is the start of school half term holidays so I have a week to make some serious progress which is really exciting.  I need to order some rubbing down blocks and paper so that I can get on with the filler work.  Now rubbing down filler is notoriously dull but I am so looking forward to seeing the whole car in primer.  Not sure I'll get that far next week but I'll give it a good go.  I also have to fit the bonnet and boot and I have a nagging feeling that the radiator is still too high which will be a pain if that is the case.  Overall it feels like a good deal of progress made in recent times so I'll worry not about that.