Sunday, 22 May 2016


So after a period of lots of intense procrastination I finally made it back into the garage.  This isn't actually the truth, I have been in the garage lots but I have been working on anything but the Healey as I can't work out what to do with the misaligned front end. So with all my excuses used up I get back to it.

Easy start, welding the front chassis section back on that supports the shroud and radiator.


I go through the rigmarole of measuring everything again to see if it is out of line and decide that I need to do something about the bulkhead and specifically the top panel, like cut if off.  So I did.
Now obviously I have yet to put it back so I am well aware that I have done the easy part but it still felt positive.  Next week is half term and I am hoping that I can get a bit of time on the car.


Saturday, 23 April 2016

Equipped with the porta-power I unlocked the garage door and got busy.  It didn't really hit the spot though.  I managed to push the scuttle back but it didn't have much effect on the positioning of the shroud.  I started measuring again and felt a little perplexed as the scuttle is pretty square to the main chassis rails.  This is a puzzle.  I took the shroud out side to get a long distance view:


It looks anything but correct.  The photo above shows the worst of the two worries.  One is that the bonnet aperture isn't great, it looks like the righthand side front edge drops too much.  Two, the righthand section of the shroud that the wing mounts onto looks compressed.  It was hard to make any meaningful conclusions though as the thing looked different every time it was moved.  I feel a little frustrated though as I paid a professional to sort out both shrouds and he assured me that they had both been put on a jig and sorted; clearly they hadn't been.  I decided to give it a break for the day and come back to it later on.

I did however notice that I hadn't put the front cross brace section on that well and so took it off again.  I have a distant memory of doing this before,....


Sunday, 3 April 2016

I had made arrangements to borrow the porta-power from my panel beater friend but when he called I was eating Easter Sunday lunch so I ignored the call.  I sent him a text but he's not great with texts so I never heard back from him.  I know he was planning to go away over the holidays so I didn't call him on bank holiday Monday, instead I headed for the garage and decided I should find something else to do.  This proved harder than I thought it might do.  I ended up renovating some bits that I am in no rush for:  Pedals, pedal bar spacer, clutch linkages, anti-roll bar and mounting brackets.  Why, well they were clearly visible and in need of a refresh.

It was quiet enjoyable work but I was struck by the length of time it took me to get it all done, coated with POR15 pre-paint metal ready and then painted.  It took the whole day.  I used a variety of wire wheels to get the bulk of the paint and rust off then dug the sand blast cabinet out to finish off the places that were hard to get to.  I tried a few things with the sand blast cabinet that I had not done before, initially I replaced the fine sand/grit with the medium stuff that I had bought some time ago and this made a massive difference.  I could almost see what was happening in the cabinet and it actually worked.  The second thing I tried was to put the compressor outside so that it didn't inhale the fine dust that filled the garage; it still lives to this days.  

Anyway, I had a lovely day procrastinating in style and ended up with some lovely shiny bits:

Pedals ready for painting


And then painted:


Sunday, 27 March 2016

Good Friday meant a return to the garage after a while away due to a combination of factors: March is a busy time for teachers as there is enough time to make changes for final year students and for those changes to make a difference, my wife and I celebrated our anniversary with a lovely weekend in Nice, I actually did some cycling and that takes time and basically I was a little cheesed off after the last session where my fears on the position of the front bulkhead came to life.  Anyway, a few weeks away and I returned with fresh energy and optimism.  I realised that I had quite missed the place and the car.  During my discussions with my panel-beater friend he was clear that the first thing to do way to put the axel back in and take measurements to check that the chassis is aligned correctly.  He said that if that was good then the body issues could be attacked with confidence that the finished car will be good to drive.  So, back to the axel then:  

Step 1: rear springs.  These went in amazingly easy compared to the first time I fitted them and made me feel happy to be back working on the car.


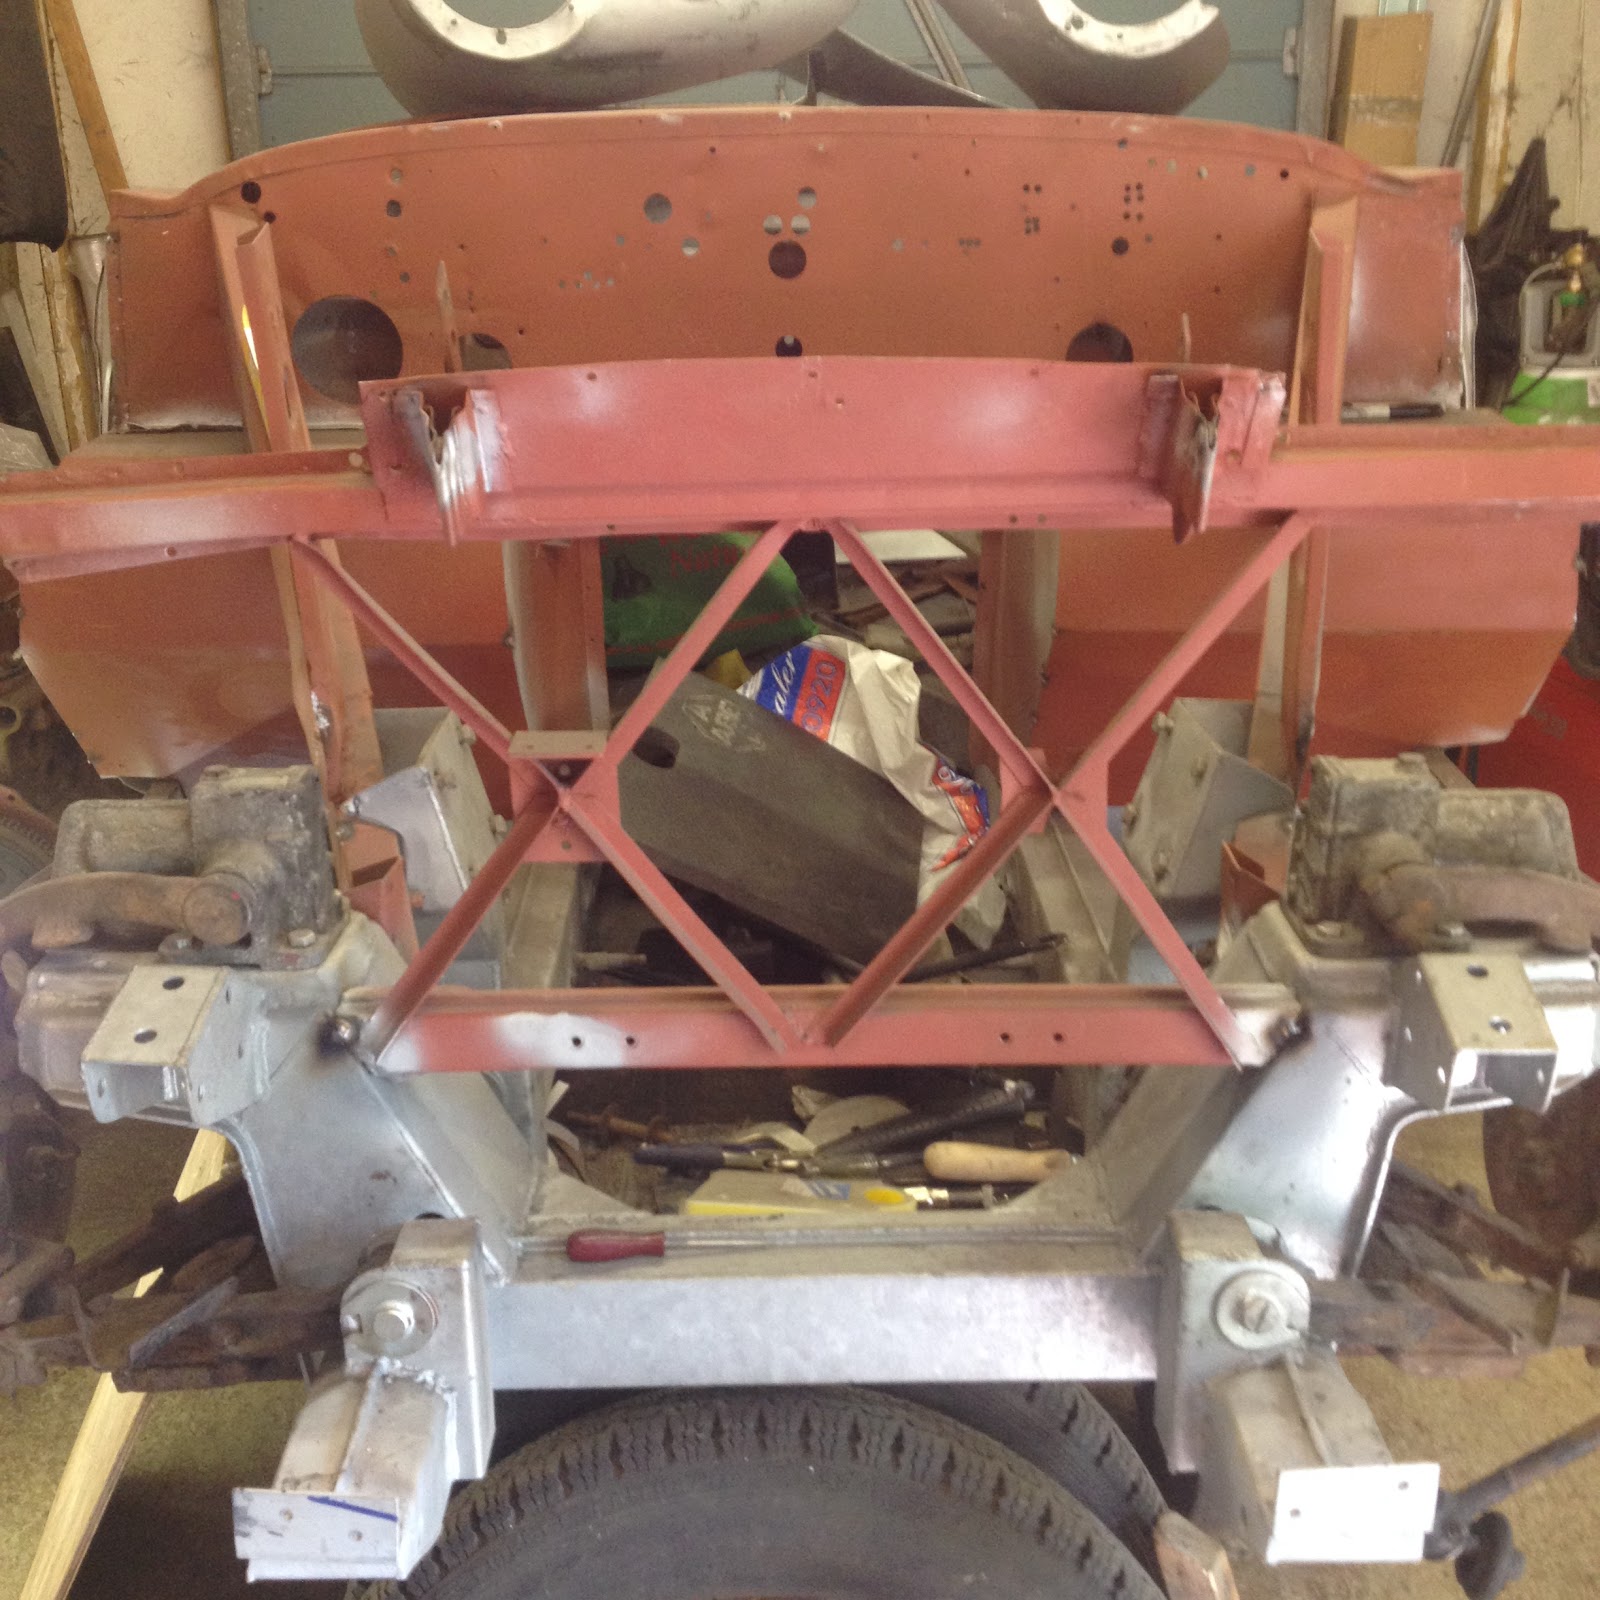
Step 2: fit the axel.  Blimey the thing is heavy.  It took a lot of energy to get it out of its long term resting place, unwrapped and moved to the other side of the garage, a mere 8-10 feet away.


I decided that I needed to take little steps and have regular rest so I used the excuse of needing lots of photos to provide the rest, lousy excuse for being leisurely I know but I took it all the same.


Once the axel was in I sat down and had a coffee, you can't possibly know how much effort that took a pen pusher to do unless you've done it yourself.  Now on to the tricky bit, getting bolted up.  Since I last fitted the axel I had extended the pins in the leaf springs that the axel sits on and it certainly made life easier to locate the axel.  Maybe it was better because the springs had been fitted before but easier it was.  Last time I had my wife and her friend, the big South African cyclist/runner on top of the car as ballast but this time I managed to get it done without much fanfare on my own.


Once nicely bolted up I took a look at the front again.  My panel-beater friend had noticed that one side of the front wishbone sat lower than the other and I soon realised that offending side was fowling on the chassis.  So I removed the wishbone and removed the metal on the chassis that the wishbone was catching on and re-fitted it all and hey presto both sides had a full range of movement.


Step 3: take measurement and hope.

Now the day was good anyway (not working on a Friday must be good, right?) but it got a whole lot better with the tape measure in my hand.  Every measurement I took from front to back was millimetre perfect.  I closed the garage door and collapsed into the bath to sooth my old back which was (and still is) grumbling about the axel fitting.

On to the bodywork.  Before I left the garage I took measurements from everywhere and no clear picture could be ascertained but after lots of pondering I concluded that the top of the bulkhead where the shroud mounts was a few millimetres further back on one side.  I don't think the shroud needs to be moved much at the back to have quite a significant movement at the front because of the length of it.  However, I am going to have to do something about it without having too much of an impact on the position of the A posts and therefore door gaps etc.  I am also reluctant to undo all of the welding I have done to the A posts and the bottom of the bulkhead / sill area because it will make a mess even though I have generally just tack welded everything to date.  I am resigned to having to revisit the door gaps though and everything that comes with it, oh well I signed up for a challenge and boy have I got one.

Tuesday, 8 March 2016

On Sunday I got round to fitting the final wing on and taking the car out of the garage.


It was quickly clear to me that the wheels didn't sit evenly, very disappointing.


The first picture above shows the wheel in further than the picture below it.  I am conscious that the wings look a little thrown on, which they are but the alignment is definitely not correct.


The sides looked fairly even so I was happy with them.

I cant quite work out where all the issues stem from but I am clear in my mind that the shroud is not positioned correctly.  I called up a friend who is a panel beater on modern cars and asked for his opinion.  He called round tonight and suggested I take measurements to check that the chassis is aligned and that the wheels on each side are square.  Once done then it is on to checking the bulkhead.

I am beginning to fear that I need to move the bulkhead and therefore upset the position of the doors and wings.  It feels very frustrating at the moment.  I am away at the weekend so it will be a few days before I get back into the garage and at the moment that feels like a wise idea.

Saturday, 5 March 2016

Having received a delivery of bushes from Ahead 4 Healeys I set about fitting the wishbones.  Naturally I realise straight away that I had been a pillock of the highest order.  The mounting posts for the wishbones are on the chassis that had been zinc plated by the previous owner and so, of course, the wishbone pins didn't fit properly.  To access them to remedy this I needed to take off the inner wings that I have only just fitted; 2 steps forward and 1.5 steps back.

Anyway, I thought that this would be a fairly relaxed job and it was although it took a while.  I started at about 9:00 and by 12:30 I had only fitted one side.  I had to stop at this stage because Spurs were playing Arsenal at 12:45 and I couldn't miss that for the world ( 2-2 in case you were wondering).


I returned in the afternoon and fitted the other wishbone and then got as far as one wing and a wheel.  I need to get in the garage tomorrow to do the same to the other side and see where we lie with regards to alignment, exciting times.


I went to see John last weekend and had an enjoyable couple of hours checking out various items.  I managed to get the bulk of a fuel pump repair kit, a spacer for the pedal bar, a replacement control box and a gearbox cover to the rear tunnel.  That was pleasing.  I also managed to locate the position of the tray that the wiper motor mounts on to as I can't find any measurements.


I discovered that John has owned this car since the mid 60s, how cool is that.

I took the chance to see what happens where the pedal bars go through the body.


And discovered that a bracket is required for a return spring to the brake master cylinder.  This was a good time for that to happen as it would have been awful to realise that after the chassis was painted.


Having previously asked I knew that Ahead 4 Healeys do not stock the brackets welded on to the chassis to mount the battery on.  John and I discussed the battery possibilities and I am thinking that I should go for a single unit as the cost of the twin batteries and the battery clamps is extremely high compared to a single equivalent.  I have been lucky enough to own a few MGBs and have always been happy enough with their twin set up but the final nail in the coffin was that the modern batteries and the brackets are not the original style.

I am thinking of reusing the clamps removed a few weeks back and making new brackets for a single battery.  I will ponder this for a while.  Another area for consideration is the removal of the battery circuit breaker switch in the boot.  Apparently they were frequently removed back in the day.  I don't have one at the moment so I may consider that a long way down the road.