Sunday, 15 April 2018

I've had a lot of time in the garage this week, Easter holidays are heaven sent for teachers.

I started by trial fitting the pedals now that I had modified the chassis mounting bracket and it went well.  I then removed them again and cut about 7mm off the chassis tube that the pedal bar goes into and remounted it all again and this time everything lined up well.  I removed it all so that I could paint the bare metal from my modifications and drilled out the end of the master cylinder rod so that it would take a bolt rather than a clevis pin.


It is amazing how dirty the chassis has got in the months since it was painted.

I then turned my attention to the steering box.  Armed with a free set of bearings I loaded them up in grease and went to fit the inner shaft only to discover that it wouldn't go in with the bearings in the way.  So I removed it all and then mounted them onto the shaft and inserted it as a complete unit, amazingly it worked.


It felt good to complete this job.


It seemed sensible to turn my attention to the brakes and so I started by replacing the linings.   I was only able to get brake linings off John rather than new shoes complete but I remember thinking at the time that it would be a new skill for me to master and exciting at that.  I spent some time looking on YouTube for guidance and eventually found a video posted by an American farmer who was doing the same to his tractor.


I made some gaskets for the wheel cylinders using my newly acquired hole punches which was time consuming but fun and then fitted them.


It occurred to me whilst doing this that the new but old stock brake linings were made by a company called Raybestos; surely they must contain asbestos? I decided that I shouldn't dwell on it.  All in all it was great fun doing it and very satisfying.


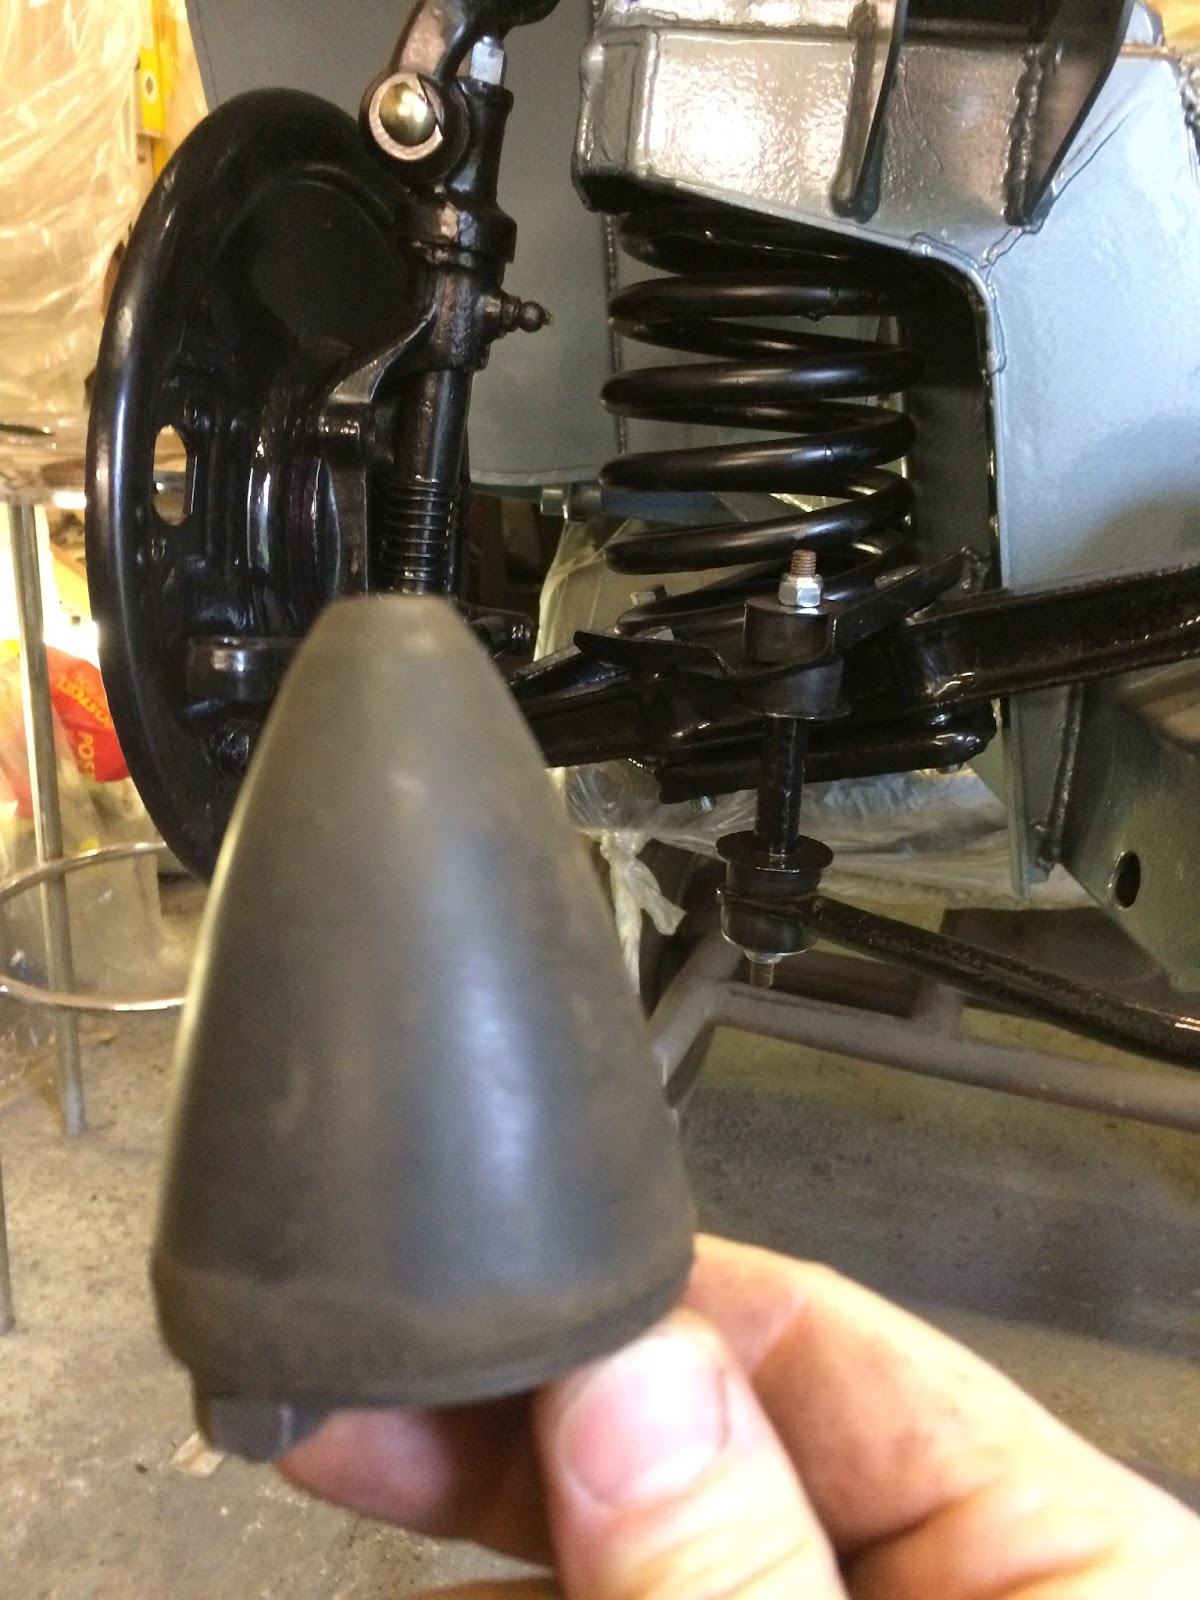
For no good reason I decided to strip down the wheel boss and paint it.


There are some cracks on the wheel but I have found out a way to repair them, thanks again YouTube.


I then installed the steering shaft and connected up the steering rods, again good fun.  The bar that runs between the steering box and the idler holds two track rod ends and they won't screw into the bar far enough.  It needs a run through with a tap but I don't have the correct size nor the left handed version so I am looking into how I might get that sorted.


Next on the list was to fit the brake shoes and the hubs, but first I needed to fit the wheel bearing into the hub.


Now I realised that I had the shoes on the wrong side as the pins that locate on to the adjusters are the wrong way round, donut.


I also realised that I had forgotten to install the felt bushes over the spacer studs, again I'm acting like a donut.


Eventually I got it all sorted.  I have made progress but it sure takes time.  Onto the brake pipes next when I next get back into the garage.

Tuesday, 10 April 2018

I decided to deal with the master cylinder mounting first.  I pondered over night and decided that I really need to cut out the metal and replace it with fresh metal with the captive nuts in the correct place.  So I took an angle grinder to my lovely Healey Ice Blue chassis and then got on with it.


I guess that a benefit is that I will have a little piece of my Healey Blue car in the garage for all time.


I cut out the correct shape and welded some nuts in the correct place before welding it back on to the car.  A few times the Healey Blue paintwork caught light and it hurt every time.  Once done I painted it with some grey POR15 paint and then went for a curry.  I ground down the welds where the aluminium spacer goes but left the rest in hope that the strength of the welds remains.


Monday, 9 April 2018

I did manage to get a few hours in the garage over Easter but it was a little disjointed as I had to share it with a fairly major overhaul of my wife's Vespa and a little work on the TT, our daily driver.

I ordered a set of bearings for the steering box as I never found them all and at £2 delivered I can cope.

I turned my attention to the brakes and quickly ran into two areas of frustration.  The first is really damn annoying.  I went to fit the master cylinder and the holes don't line up with the captive nuts on the chassis.  This is damn annoying because I never saw it coming and never checked before I painted the chassis.  I thought to ream out the tubes that take the pedal bar before I welded the sills on as it would have been very tricky afterwards but the captive nuts, no.  You can see in the photo that they are spaced incorrectly.  It is annoying because I could have dealt with this during the welding phase without too much trouble but now it is a pain.  I would have cut the end plate off and welded a new one in with new captive nuts attached but this would decimate the paint work now and I can't face it.  I am pondering on it.


I then fitted the pedals and had a few nervous moments before I made the first cuts into the footwell panel.  The holes are a little bigger that I would like but hey ho, what is one to do.  It came together reasonably easily which was pleasing.


However when I sat back and looked at everything I noticed my next challenge.  The end of the pedal bar appears to protrude into the engine bay area a little too much.


Then when I looked at the master cylinder I saw the rod appears to be out of line.  I took some measurements and studied all the photos I have of other peoples 100s and came to the conclusion that the pedal bar is 5mm too far into the engine bay.  The dark photo below shows this.


So I looked for the reason behind this and can only think that the chassis rail that holds the tube that the pedal bar goes into is in the wrong place or that the tube is too long and judging by the master cylinder mounting captive nuts either is possible.  I am going to reduce the length of the tube in the chassis rail by 5mm as a solution.

Whilst we are on peculiarities of the chassis and the braking system I noticed during my research into the front steering that I don't have anywhere to fit the brake hose to pipe connector.  The following picture shows the steering mounting points on the chassis and it is evident that there is a web missing between this and the shock turret.


I have kept the original chassis propped up against our neighbours garage for moments like this when I need to check the finer details and you can clearly see the web that is missing on my new chassis.  I am beginning to feel that whoever made the chassis forgot about the brakes, oh well.


I knocked up a couple of brackets for the pipe connectors which should do the job.


I said this was disjointed and this is another example.  Whilst waiting for the steering box bearings I have been looking at other areas that I need to address and the fuel and brake pipes are one such area.  I dug out the SU carbs which when I stored them a few (many) years back were shining but are now completely dusty.  I noticed thought that I need to get the pipe with banjo connections for it.  Ahead 4 Healey's sell it but it is near £100 by the time you get VAT and delivery so I am going to have a go at making one, gulp.  I have the petrol pump to rebuild, gulp again.  And I need the connectors to allow me to make the main pipe and I am not sure what they are but I suspect that they are of the olive and nut type.  Some research needed.


I then drifted onto the engine and dug out the mounts only to discover that I am missing one of the 4 main brackets, this is a shame as they are very expensive, oh well, again.  I have no idea what the two  brackets on the right are for?


It feels like I am at a very exciting stage of the rebuild, must get on with it.

Saturday, 31 March 2018

So having realised that I had left this baby out of my suspension build I set about sorting that out.


It was easier to remove having done it a few times, frustrating none the less.


I then got on with putting the master cylinder together, this went very well and it was soon complete and painted.


Next was the idler.  I put it together and it had a rough spot when I rotated it so I striped it, cleaned out the grease and then hunted for the culprit which turned out to be a foreign object that had embedded itself into the main shaft where it sits on the casing.  So I spent a while cleaning it all up before making a new gasket and putting it back together again.  Success this time.


Onto the steering box.  I cleaned out the shaft and refitted the felt bush at the top of the column.  I then set about cleaning up the shims and all the other components.


One of the threads need a clean out, BSF.


I then laid out all the parts and decided I would grease the bearing cup at the top of the worm drive and fit it complete.


Like a blithering idiot I dropped it on route to the housing.  I spent an hour or more on my hands and knees looking for the ball bearings and only managed to find 11 or the 14.  Damn.  I grew frustrated and gave up and headed for a hot bath.  Tomorrow's task.


Monday, 19 March 2018

I missed a weekend.  Well actually I worked in the garage for the last two weekends and never got round to writing about it.  I put the second side of the suspension together which was much easier than the first because I knew what I was doing.


Then I turned my attention to the anti-roll bar which was very enjoyable to fit even though it took me ages to work out what thread the mounting bolts were.  I thought they'd be UNF but I couldn't quite get the guts to just plug a tap into it and clear out the paint.  In the end I did and it worked out well.


The day day I put the brake back plates on and instantly knew something wasn't right.  When I tightened up the bolts I lost smoothness in the kingpin.  Not sure why and a bit confused at the thought of the stub axel being bent out of line by the back plate I took a pause and caught advice from others.


That was last weekend.   This weekend I took off the plates and instantly saw the culprit, the kingpin was rubbing on the backplate.  a fresh metal gauge shows in the photo below.


I got the angle grinder out and modified the backplate, painted it and installed it on the car.  Hey presto, a perfectly smooth kingpin, phew.


I then turned my attention to the steering.  I stripped down the steering box and noticed that there were some ball bearings loose in it.  Now I hadn't planned on actually stripping this but now it was apparent that I would need to so apart it came.  Quite glad I did as I will replace the felt washer at the top of the column.


I cleaned out the box itself and then ground down the shaft before painting it and the idler box and a few other bits and pieces.

Whilst I was looking for the clamp at the top of the column that sits off the support for the steering wheel I discovered a bag with amongst other things a rubber for the front suspension and thought that it was odd that I had one as I wasn't aware of it.  Only then did I realise that I hadn't fitted it to the pan it was supposed to be attached to before I installed the suspension.  Damn, I have to take it all apart again.  Oh well.