Tuesday, 26 May 2020

I was going to start with the washers but got distracted by the grille.  I lined it up again and realised that it is a little further out than I would like.  I also realised that the screws that hold it to the trim were not all in and when I tried to add the remaining few it became obvious that it was out of alignment so I took it all to pieces again.  You can see the edges on one side are straight but not on the other.  Naturally I just hung it on the wall and got on with the washers.


I greatly enjoyed making the washers.  It probably took less time than it would have taken me to earn £16 as well, mind they still need a coat of paint.  The first picture shows the strip of metal marked for cutting.


So, having procrastinated for a long time I got the seats out.  And boy did the fun start.  First thing I noticed is that the piping is blue and I thought it would have been white.  I have bought blue leather with blue piping but in my memory the colour is a lot lighter than this navy colour, I will have to have a look.


I had a little try and thought it was very comfy.


 The strip down revealed a very rusty seat back.


The original seats had a lot of wadding on the inside of the cover and as my cushions have none of that I hope the seat covers have.


I had a little try of the electric seat panels for size, a very good fit, but don't tell anybody.


Then I started grinding.


And I did some more and then had lunch.  Then I came back and did some more.  Flippineck I had this wire wheel on an angle grinder going for hours and I only did one seat.  And I got proper dirty.


Once done, many hours later, I set about making a metal insert for the one area that is rotten.  By the time this was done I was too whacked to actually weld it.


Now I realise that I need some more stuff.  I need the tacks which hold the leather on to the wooden strip on the bottom of the back, the rivets that hold that wood to the seat back, some wadding for the seat back and 4 bolts for the base.  This of course means I can't finish it this week.  I should have seen that coming.  I could start the second seat but every ounce of my common sense tells me to keep that intact until I have finished covering the seat I have started so I will wait.  I can do the bases though.

As an aside, have a look at the picture of the Healey next to our car.  The 100 is known as a big Healey because it was a big car and the BMW is a small 2 series.  The smallest new BMW dwarfed the biggest old Healey.


Monday, 25 May 2020


I remade the vertical panel yesterday.  I made a few adjustments to the template so that the vertices of the returns were neater at the same time and am happy with this now.  I came across the one grille mounting washers that I have and it prompted me to start to think about that.  I need 5 in total and they cost £16 which is too much for what is essentially a bent washer with a couple of tabs so I decided that I should make some.  I've found some suitable metal and taken measurements so that is going to be the next task.  Then the seats.

I have the rest of this week as half term holiday and then I am back to work which means that I need to get the last remaining big task out of the way while I have a few days in a row to do so.

Sunday, 24 May 2020

I started the day by doing some work on the aluminium screen pillars.  I used the Dremel to sand down the remains of the screws that were presumably used to attach mounting brackets for a hard top.  I rubbed all the original paint off, red and blue and then filled the holes left by the screws I had successfully removed.  The red paint makes me wonder why somebody would have gone to the expense of painting a lovely Ice Blue car red?  They did a very good job as well because the car must have been stripped completely as there was almost no visible blue paint with the exception of underside of the front bulkhead panels behind the dashboard.

Then I took the templates for the panels behind the grille that Tony Robinson sent me several years ago and started on them by using some baking paper as tracing paper to cut out and then transfer the pattern to the aluminium sheet. This made me smile as it reminded me of the day of a maths GCSE exam at work that we ran out of tracing paper and so had to improvise by running to the local Tesco supermarket to buy baking paper for the students to use; they never batted an eye.


It was quite enjoyable making the panels.  Having cut them out I bent some of the returns over using a mini anvil and a hammer but noticed that it introduced some curvature into the panel so I decided to make a clamp and see if that worked better.  I have a few sections of angle iron and by clamping them in the vice and using G-clamps I was able to secure the metal so that when I hammered it over it remained straight, great.  The floor section of the set worked wonderfully and looks great in situ.  I am rather drawn to the polished aluminium look and might not paint them after all, something to ponder.


At this stage I tried the grille to check that the panel didn't interfere with it, it didn't.  The grille looked a little ramshackle when I first picked it up but it looked wonderful on the car.  I was particularly pleased that it clamped against the bodywork really well without significant gaps, totally cool.


I posted a picture of this on Instagram and decided to use one of the colour filters they have, can you see which one that was?

When I fitted the vertical section I realised that bottom return wasn't well aligned for my car so I straightened it and then added it again but in a slightly different position which has left me with a tapered return that is frustrating.  I think I will be remaking this panel tomorrow.


I needed to add an extra slot in the floor section to get it to fit around the chassis X braces however, I wasn't sure about this so I dug out my copy of the Austin Healey 100 restoration guide by Gary Anderson to check.  While doing that I found a photo that clearly showed the vertical panel in the middle of the aperture, in fact it looks rather similar to the picture above.  It made me think because this book is rather rare now and is advertised for up to £300 and so it had crossed my mind to sell my copy and add the money to the car fund.  But having used it today I think I should keep it for a while yet.  I also noticed that the middle screw used to mount the grille sits exactly where the vertical front edge of my new panel sits so I may modify the second version to give me some space for that.  Finally when I look at these photos I realise that whilst the floor panel looks great in bare metal the vertical one doesn't look so hot where it has been hammered during productions so I think they will be painted after all.

I decided one night that I would just make holes larger for the windscreen support and it worked.  I needed to get the car out of the garage to do it as I needed the door fully open and as I can't push it easily having adjusted the brakes I got the key and started it.  It span over for ages before catching and starting but once it did it was very civilised.  The frame fits well which is good but the bottom of the screen is not a uniform height from the shroud which is a worry; I will ponder on this later on.


Saturday, 16 May 2020

I've had a thoroughly testing week looking at the windscreen components.  I think the Coronavirus lockdown must be getting to me as the whole restoration has been testing but now testing feels remarkably close to frustrating.  Oh well.

I did get the pillars to fit into the bases well having attacked the pillars with a file.  This felt awkward though as I am conscious that these items are original and rare and it seems somewhat loutish to be adjusting them in such a way.  However once done I looked to fitting the new metalwork that I had bought for the screen only to discover more frustration.

I noticed that when I trial fitted the beautiful looking fold down links that I couldn't get the spring assembly to fit.  On further investigation I discovered that the two links were different.  One had a hole for the spring assembly that was too small for it to fit.  I thought about drilling it out but then realised that the hole would then rust and probably quite quickly.  I then noticed that the slots on the other end of the links were different distances away meaning that, potentially the screen would pivot at an angle.  When I fitted the knurled knob one of them wouldn't screw onto the pin because it was already rusty.  When I looked at the knurled knob in detail I saw that the chrome plating looked like it wasn't completely over the item meaning that it too would rust.  Finally when I went to fit the screw into the pin I discovered that it had a different thread and so didn't fit either.   Aaaarrrgghhhhhhhhh.


So I contacted the supplier who said that they would look at them but because they were on a reduced staffing level they couldn't say when they would.  Wonderful.

On a different note I bought a new solenoid from another supplier because somewhere along the route of Healey restoration I was told that this specific supplier sold the best quality solenoids.  They are the same price as the two companies I generally use so I thought why not.  I noticed on their website that they advertised I number plate lamp that was chromed metal and complete with a glass lens so I bought that as well.  When I got the thing it was cheap, nasty and made of plastic.  I emailed to say that I wanted a refund and was told to send it back to Germany.  Germany, why Germany when I bought the item in the UK and the postage will cost double.  I wouldn't mind but there was no apology either.

I see this from both sides.  It must be hard for a company to make money selling Healey parts when there is a competitive market and limited customers.  I mean how many knurled knobs can a company sell a year?  And whilst this lot cost the best part of £240 they probably had to do quite a lot of work for the amount of profit they would have made.  However, they have got to quality check this stuff.  If they sell two things that fit together then they should check that they do actually fit together.  If they say the lens is glass then it ought be glass.

Rant over.  I wonder if this is lockdown related?  I mean I think I rant too much these days.  Got to chill a little.

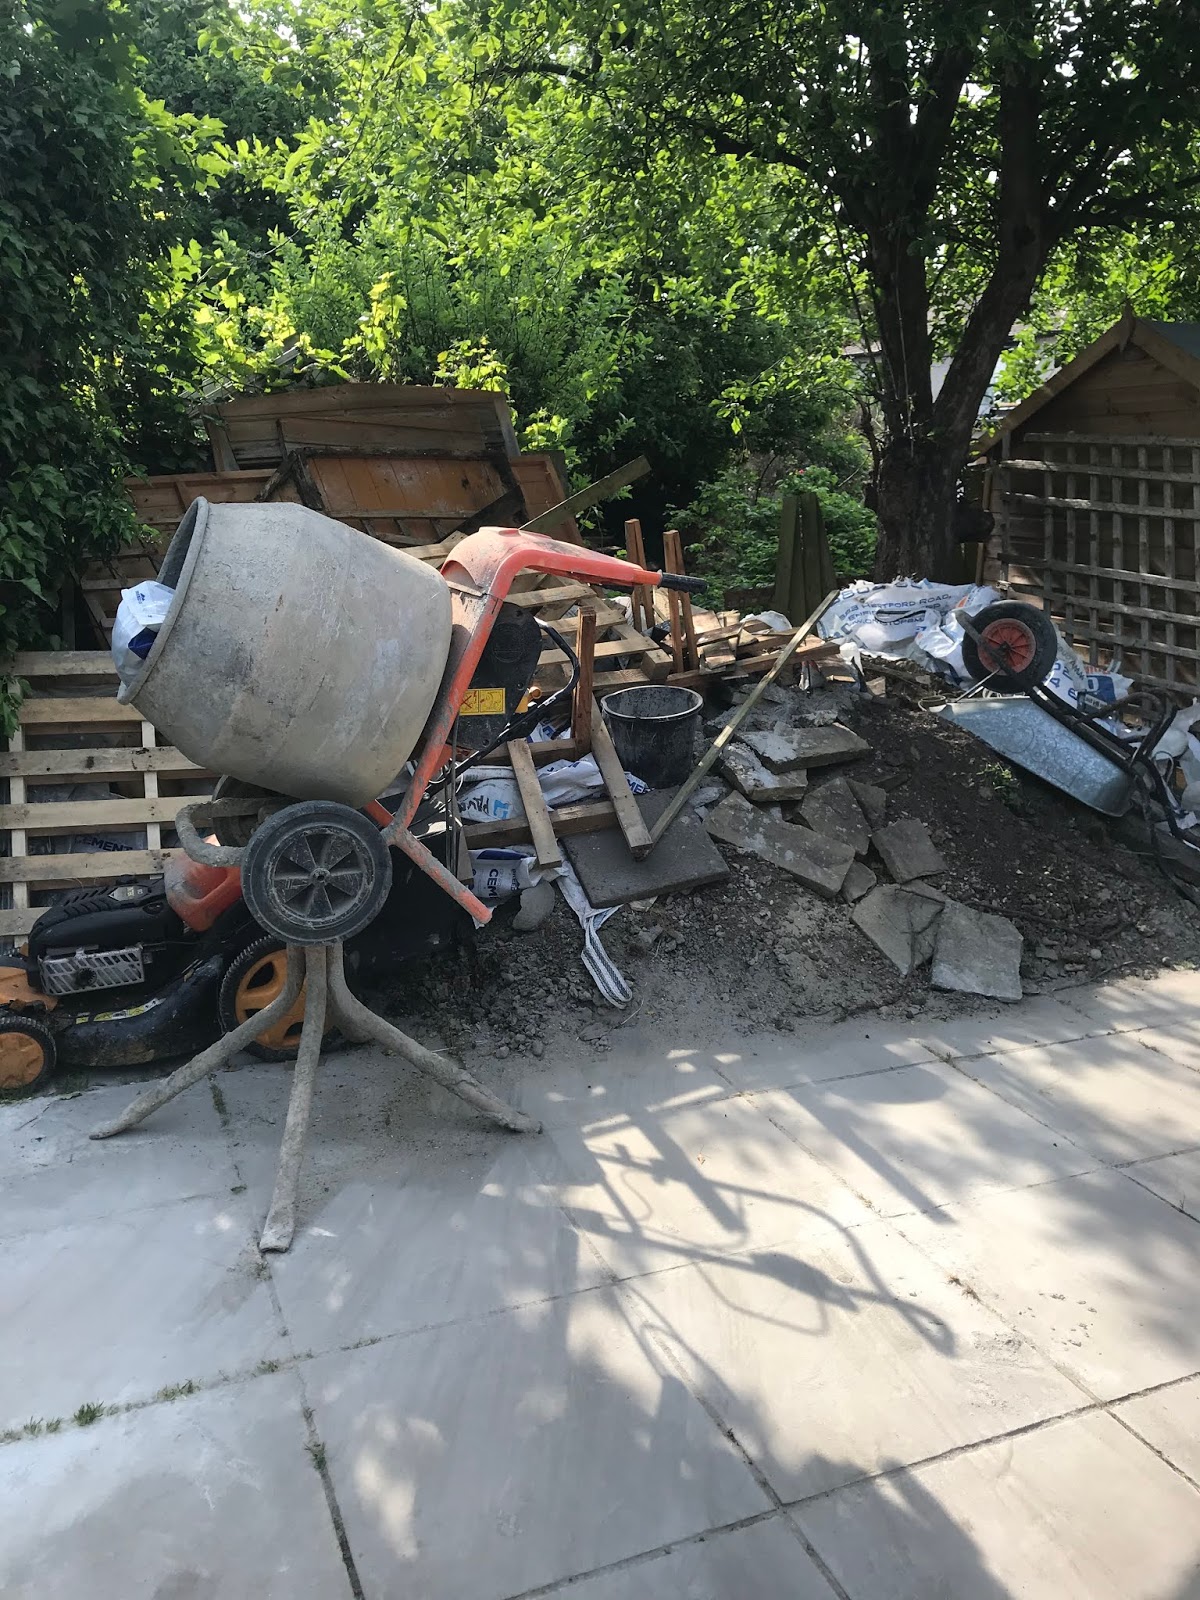
This all happened during the week.  Yesterday I did the very few final jobs from the patio such as fitting the ground anchor for the Triumph in its new position and dropping back the wheel barrow and power supply to the in-laws from where they came before continuing with the screen.


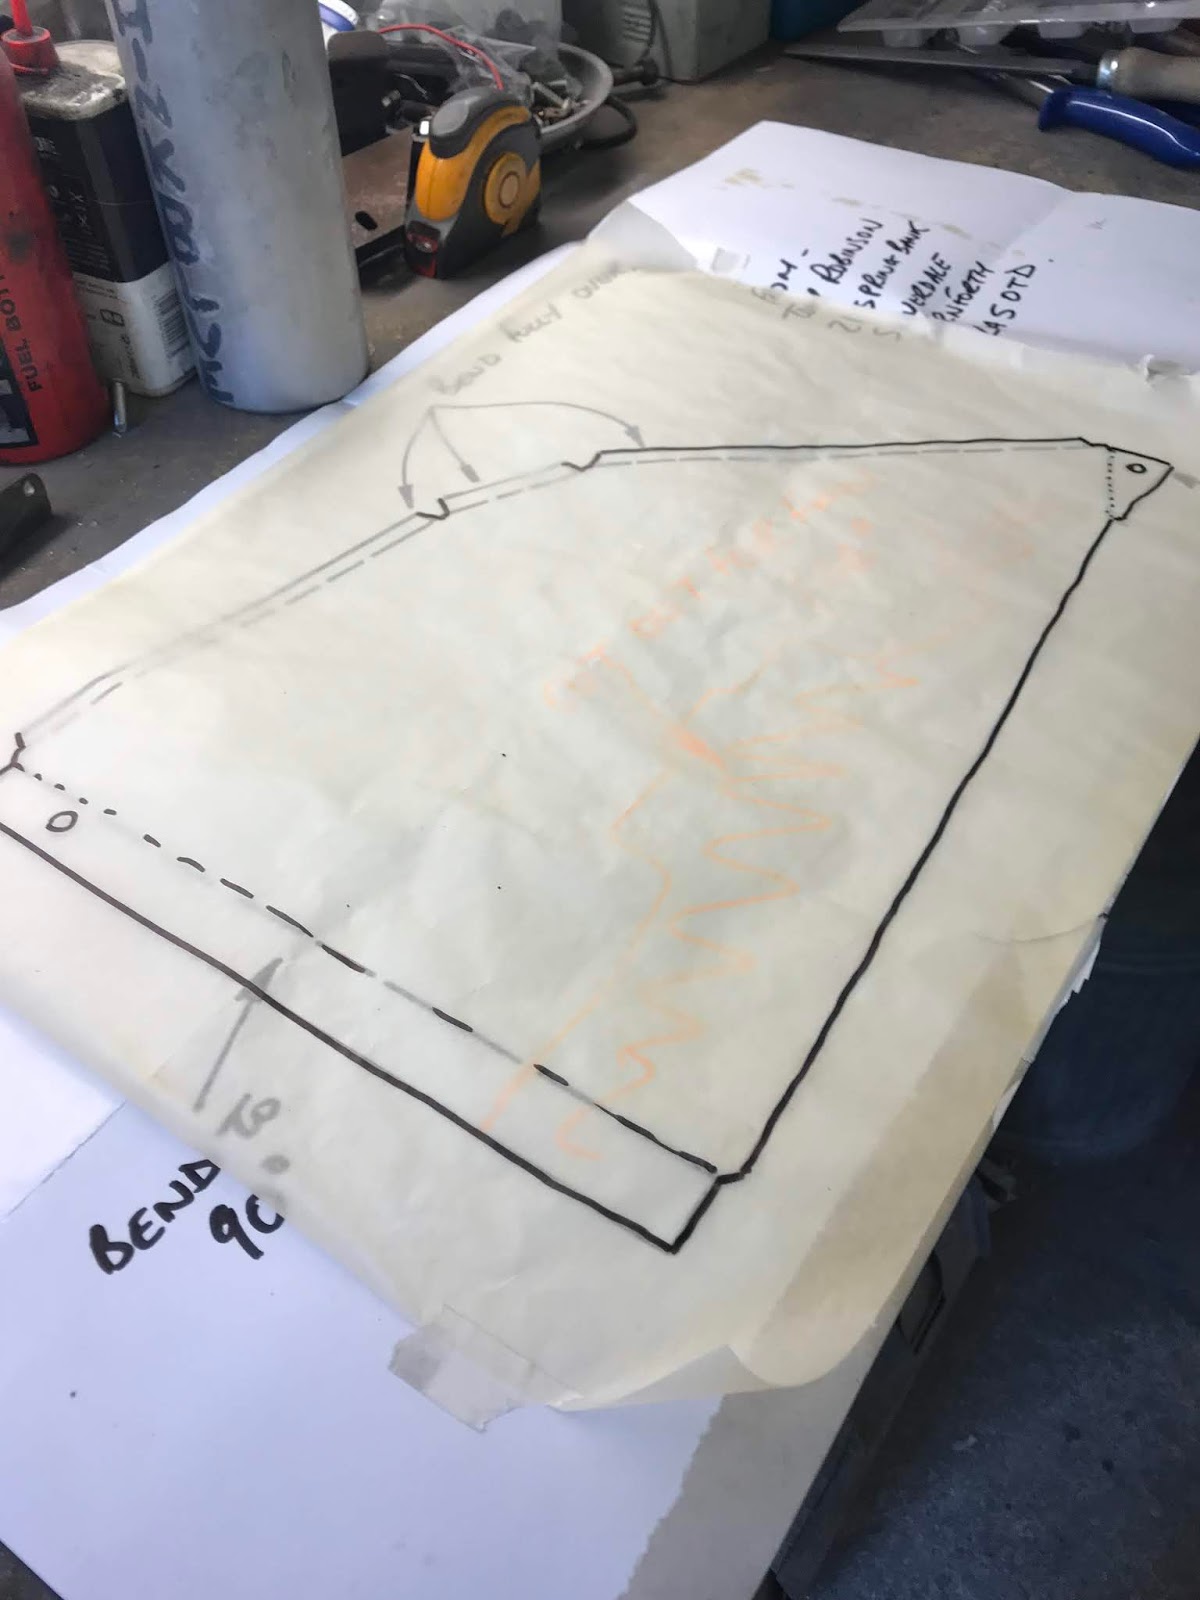
I had the devil's own job getting this far.  The passenger mount is secured but the drivers side is just resting in place.  The screen surround doesn't fit together and will need some modification, gulp.  I can't really see what has changed with the regards to the pillar bases as I have had them in place since the car has been in colour.  The only thing that has changed is that I have bolted up the wings fully with the beading in position.  On that front you can see the wing mount for the screen when in the lowered position on the screen and that is because despite allowing some room for manoeuvre when cutting the beading to size I didn't leave enough.  Oh well, again, better to have it too long than too short.

Whilst being thoroughly miserable I also noticed that the rear shroud has got cracks in the paint from the boot aperture at the corners which is very sad.  I don't what I could have done about this I had this section welded as part of the process of restoring them.  I haven't even driven the car since the paint was done which could means that once I do even more cracks are going to appear.  I am consoled by the fact that this was never going to be a concours restoration nor was I doing it to sell for lots of money.  I have always hoped that I would end up with a useable and reliable car that is good to drive and looks good.  And it looks good.

On a positive note, the screed does fit in the bases ok and if that hadn't happened it would have been an astronomical cluster f***.  It does look good.

Sunday, 10 May 2020

We decided to do some work in the garden during the Corona virus lockdown and once started I didn't want to stop until it was all done.  It took ages.


This is the new patio complete with a raised bed for planting veg.  Would be full of earth by now if the shops that sell it didn't have such horrific queues to get in.


New shed and bike getting a service.


A massive pile of rubble awaiting the arrival of a skip tomorrow.


I have pondered over what to do next for the best part of the last month and decided that I should do all the bits that require painting Ice Blue.  There are lots of bits and pieces such as the tunnel cover and the bonnet catch bracket.  The two items that require proper work on my behalf are the screen pillars and the panels that go behind the grille and I have decided to do the screen pillars first.  Some chap sent me templates for the behind the grille panels in exchange for templates for the heat shields that mount on the underside of the bodywork above the exhaust.  It seemed like a good deal and I now have two templates and a few pieces of aluminium to make those panels.  However, the pillars won and I started those first.

All the bits laid out.


I trial fitted the edge of the screen surround to the pillar but I knew instantly that my repair work on the threads to the pillar was unsuccessful.


The four screws were loose in the pillar so I knew I had to do something.  I had two choices, fill the holes with aluminium and then drill and tap a new thread in or drill some new holes and tap them.  I knew there is something uncivilised about drilling new holes but nobody is going to be able to see them and it is certainly a lot easier to do.

I used the existing screw holes to locate the screen surround in the correct position and then started drilling.


I have to tell you that I did a lot of procrastinating before I drilled into those recently chromed windscreen surrounds.


I even put tape on the drill bits so that I wouldn't drill through the pillars.


It worked out ok in the end and the two sections fitted together well.


When I tried the new corner brackets on the screen surround I was rather struck by how long the screws were and how much they protruded from the bracket towards where the screen will locate, something I will look into.


Very much liking the newly chromed windscreen pillar bases.


I noticed that they had numbers stamped into them that are also stamped into the pillars which I presume makes them a pair?  They didn't fit together very well though and this I will also look into.