Sunday, 17 September 2017

Well the return to work has been consuming.  Now I like my job, well actually I love my job but it knocks the living daylights out of me so getting in the garage is nigh on impossible during the week.  Last weekend I was out on the Triumph Thruxton so that means that it is two weeks since I last got going on the Healey.  I started by collecting some stuff from my in-laws shed so I could get on with building up the drive train.  I was a little undecided on what exactly to take.  I took the rear springs so that I could mount the axel and the shocks as I know they will go on soon.  I also took the front wishbone / kingpin set up but decided against taking the box with all the brake parts and bearings which I will definitely need when I do the front suspension.  Sometimes there is no logic in my world.


Illogically I decided that I would start by looking at the the rear shocks.  It took some Oxy-Acetelene action to persuade the shock link (the thing that is on fire below) to come away from the shock arm.  I'm a little perplexed now because I wasn't sure what the shock link was called so I looked on Ahead 4 Healey's site to check the name and have seen that the type I have taken off the car today is the type fitted to the late 100 cars.  Now everything else about the rear suspension is the early type, so how does that work out?


Having teased it apart with minimal force and maximum skill (Oxy-Acetelene and a big hammer) I left it to cool.


Then I set about getting the crud off.  One of them looked much better than the other as far as the build up of road grim is concerned.


However, on the inside they were identical.  Both looked well topped up with oil but both had loads of congealed gunk inside, some of which is visible in the picture below.


I emptied the oil into a waste canister and you can see the type of gunk I referred to in the picture below.


Having had a good go at cleaning the inside out I figured I should probably run some fresh oil though it to flush out the rubbish.  However, I couldn't actually waste good oil on this so I filled the pair with degreaser and place the cap back on.


So now I just need to remove the degreaser and double check that it is truly clean before filling with oil.  Actually I need to order the oil as well.  Once done I will paint it black.  I know the original colour was silver, well just aluminium but I'm convinced it'll just corrode so I'd rather have it black and neat looking than original and corroded.


Wednesday, 6 September 2017

Grille distraction

Well I did fit the rubber on the chassis to prevent the chassis crashing down on it and it felt very good to start putting things on that are going to stay on.


Then I went to fit the springs only to remember that I had stored them and was unable to access them so I looked for something else to work on.  I found the grille and thought it would be a good thing to have a go at.

I had stripped the grille some time back and separated the two sections before making a start on cleaning it up.  This is as it was having dug it out from under the bench.


I had studiously ignored the fact that one of the slats had broken away  from the frame at one end though.


So I made myself a sandwich and searched Youtube for a video or two on how to braze.  A great sandwich and many videos later I returned to the garage and got down to brazing.  I had never bean able to braze successfully as a kid although I had watched both my Dad and my metalwork teacher do it many times.  So I set up some practice pieces and tried and tried until I got somewhere that looked OK.  However, the trial pieces kept pulling apart and I became unsure if I was making too much of my abilities.  In the end I decided that there was no alternative so just go on with it.  And it worked out well, if not too pretty.


You can clearly see the braze in the picture above but from the front it doesn't show.


Then I dug out the surround and cleaned that up before fitting the two parts together.  I was delighted to discover that I had actually bought the small screws for assembling it when I took it apart, very organised.

I think it looks absolutely wonderful although I have some fettling on the fitment side of things to come, but by George does it look good.


Saturday, 2 September 2017

Brackets in place

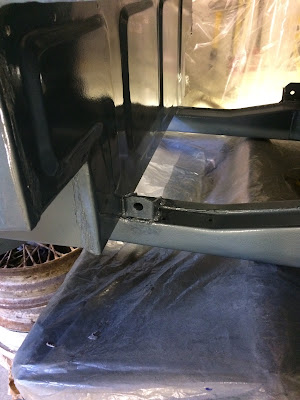
After a leisurely week of dipping in and out of the garage I did get the missing brackets welded on and painted.  Pleased with the results and hoping that I dot discover anything else that is missing.  On reflection I don't regret painting the inner bodywork when I did, I had to make the jump at some point.

Tomorrow I am going to bolt the rubbers that the axel bottoms out on for the final time.  It'll be the first item I fit on the car and feels a little symbolic to my small mind.