Sunday, 4 December 2016

Wow, it has been over a month.  I did go to the classic car show in the Birmingham NEC and had a lovely, though very damp time.  I had intended to drive the regular run around but when I went to leave I noticed that the front tyre was flat.  So flat in fact that it would not trigger the pump in the garage so I brought it back home.  I could have pumped it up at home but decided that if it gets that flat I probably should get in replaced rather than contemplate a 250 mile round trip.  So even though it was absolutely lashing it down with rain I took the Triumph.  I discovered within 10 miles that my waterproof clothing wasn't actually waterproof.  It was awful.  Anyway, once there I had  lovely time.

I have found a mobile welder that will do the shrouds for £300 plus a bonus for working at a weekend.  This is troubling me a little as I can buy an AC TIG machine from China for £400 and then get the gas for another £100.  I realise that this is more but I would then have the equipment for life.  I have posted the question on a UK welding forum and the responses leave me feeling very demotivated. The people that say I should get the professional to do it outnumber the 'have a go yourself' brigade by some margin.

Talking of demotivated I looked at the car again this morning and knew that I needed to finish the door gaps, again.  So I removed the rear wing and B post before cleaning it up:


I then took to the rear edge off the front wing with a grinder and literally ground the wing back to provide a better level of gap.  I spent a few happy hours welding and grinding before repeating it again, and again.


Saturday, 29 October 2016

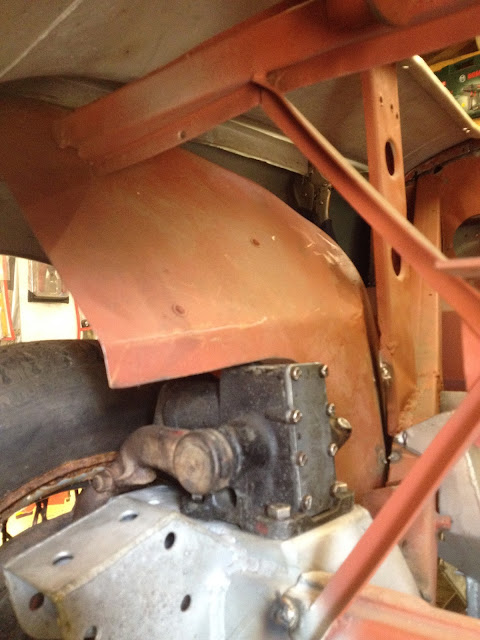
I have manage a few days with the Healey this week which has been very enjoyable.  I cleaned up and finished off some of the welding that is required in the areas covered by the inner wings.


I then decided to look at the driver side wing as it was looking a little out in the length with the new shroud position.  This means that the process I went through a long time ago to remove a piece of metal was in need of reversal, frustratingly.  I could see the required length by looking at the front and by measuring the gaps between the wheels and the wheel arches of both front wings.  The replacement went quiet smoothly and now the car bodywork is looking very much closer to being ready for the next stage.  One of the other developments created by the movement of the shroud is that whilst the driver side needed extending the passenger side needs the reverse; the dreaded door gaps are not ideal.  This will require visiting before I move much further on and I need a little strength for it so I will leave it a few days.

I have decided to get the shrouds welded professionally rather than buying the equipment and doing it myself.  In an ideal world I would like a mobile welder to visit me and do the shrouds in situ.  I have contacted several suitable looking companies and await there views on the project.  I am off to the classic car show in Birmingham in a few weeks and this is one of the topics I will investigate whilst there.

Now that the half term holiday is coming to an end it is back to work for me.


Tuesday, 25 October 2016

These are the pictures that should have been with the last post but for some reason my phone didn't import them for a few days?

Anyway, the wing looking tired:


This is the inner wing on the near side:


And on the off side, except I forgot about the mole grips whilst taking them so one can't see what I was hoping to show, sausage features springs to mind.


The inner wings on both sides trial fitted and looking ok from the inside:


The next two photos are cool, they show a similar position with regards to the inner wing joint for both sides.  Phew.


The next two show one side with a tab for connecting to the top of the shroud / wing on one wing with it missing on the other.  I know it was there and I don't remember removing it,......

Sunday, 23 October 2016

Yesterday I got the puller from my pal and started to attack the shroud.  Being aluminium it moved easily and after a lot of crashing and banging I stuck the wings on and took a step back.  I liked what I saw.  The wings line up reasonably well along the length of the car, the door gaps are ok, the wheels look equally set back in the arches.  It feels like I should move on.

This feels odd.  I should feel elated but I actually feel a little confused, as if I can't quite believe it is time to make some progress.

Today, after a trip into central London on the Thruxton and a posh breakfast at the posh biker hang out in Shoreditch (a trendy party of London that used to be run down but is now rejuvenated and hip) I got back in to the garage.  I started by putting the inner wings on the car again.  This time they sat nicely on both sides.  I can't quite believe it.

I do have some issues to worry over though.  The shroud is very tatty in places and needs lots of welding.  I can't decide if I should take the shroud to somebody professional and let them work their magic or if I should learn how to weld aluminium, buy the equipment needed and do it myself.  In the long run it would be better if I could weld aluminium but the equipment alone will be £600 plus if I get it from the main man in America.  I could possibly buy something similar in the UK but after an afternoon sat on the sofa whilst surfing I am no nearer finding somebody that could supply the required stuff.  Decisions, decisions.  I am going to weld the inner wings on and then start the lovely job of welding the car up properly, something I have dreamed of for years, lovely, bloody fantastic.


Sunday, 16 October 2016

I've been distracted, it was impossible not to be:


OK, so I was 50 in the summer and my lovely wife asked me what I wanted for my birthday the very same weekend that I had discovered one of my neighbours owned a classic BSA so I flippantly said 'A motorbike'.  She replied, what a good idea, what type would you like?  Now I would love a classic bike but the Healey is struggling already and the thought of it being sidelined by a bike was too much so I started to look at newer machines and eventually ended up on a Triumph Thruxton.  I went to test ride one a few months back and liked it but it wasn't just meaty enough.  Then I discovered the new 1200cc R version and the rest is history.  I collected it three weeks ago and have it already run in.  I love it.  Of course it hasn't helped the Healey that every weekend I want to be on it but today it rained so I opened the garage door again.

Actually I should talk about yesterday first.  My wife, Wilf the bulldog and I went to the annual Rawles open day.  It was fantastic as it always is.  One gets the opportunity to roam around their premises unhindered and it is fascinating.  I always hope there is a 100 being worked on but the last few years there hasn't been which is a shame.  Anyway, lots of people drive out there for a free burger, coffee and a chat so it becomes a classic car show with predominantly Healeys on show everywhere.  It is fantastic.  Now I always like seeing other peoples Healey 100's because it calms my nerves a little on what is acceptable.  One of the things that has sat on my mind a little is that my shroud doesn't have a return for a rubber trim where it sits up against the doors.  John (Healey 100 register fame) tells me that this isn't uncommon but every car I have ever seen has had them; until yesterday:


I desperately wanted to open the door and see what the trim looked like but I couldn't see the owner anywhere to ask so I settled for some pictures.  I got the gist though and it settled my mind wonderfully.

Note: the sunshine, it was lovely.

So back to today.  Too wet to ride the Thruxton to a posh cafe for a slap up breakfast so I made a bacon sandwich and opened the garage door.  Now, next week is half term and we are not going away so I am determined to borrow the puller tool off my panel beater pal, Rob and have a go at the shroud.  Having procrastinated by clearing up the garage I realised that the only thing I could do in advance of that is bolt the shroud back to the front chassis mounts so that it is fixed and therefore less likely to move when the pushing/pulling goes on.  I got down to check that the shroud was in the centre of the chassis legs when looking at the bottom of it and noticed the mark I had previously put to signify the centre of the shroud.  Something went off in my mind and I got the laser leveller out and set it up.  I then started to measure from the centre of the shroud to various points on the right hand side and was able to establish exactly how far I need to pull the shroud to get it even.  This felt very satisfying.


I marked the required measurements on the shroud and then moved on to the grille.


The last time I tried the grille on the car it was a nightmare because the shroud was being held in a position that forced the grille aperture to warp a little.  But because I have moved the shuttle the shroud now sits move comfortably on the car and the grille fitted wonderfully.  I couldn't help but notice how dull it was so started to clean it.


I rubbed and rubbed with wire wool and got bored and gave up.  I'll have to do it bit by bit I think.


When I took the grille apart I discovered that some of the studs that mount it to the grille surround were broken.  I set about trying to find suitable studding to repair it when I discovered the exact same threaded bolt in my stores, complete result.  I set about cleaning up the original studs then mig welded the bolts to the grille before cleaning it all up.


Broken studs:


Repaired stud:


I enjoyed today.


Sunday, 11 September 2016


It was sunny in North London today so I got the car out and started measuring.  I decided to take off the wings and shroud so that I could weld the bulkhead top panel back on.  Once done I put it all back  again.

When I look at it from afar the car looks reasonably ok, there are no massive issues and if it was all painted in a lovely shiny Healey Blue colour then I am confident it would look great.  The wheels are vertically aligned which is great news.  The near side shape is still out though and I think I can improve on it so I am going to have a go.  I will need to borrow an old slide puller from my panel beater friend Rob and hopefully I can do that in the next week or two.  Will keep you posted.

I managed to visit John last week and collect a new shock, well a refurbished one that is.


I enjoyed talking with John and as usual learnt a lot about the workings of shock absorbers.  In the second photo it is easy to see the extra length of the arms on the suspect item.  Apparently it isn't an MGB one though.  Anyway, back on the car and the wheels look to have much better vertical alignment although as it was raining I was unable to take the car out of the garage, maybe tomorrow.

Wednesday, 31 August 2016

Back from holiday and on to the car.  I start by procrastinating again.  I just spend ages looking round it to decide what the way forward should be.  I have the panel that sits on top of the front of the inner bodywork that supports the shroud resting in place having previously removed it.  The shroud is mounted along with the wings.  I have the shroud twisted slightly so that the front is in a more neutral position when compared to the chassis rails and bonnet brackets.  From the front the car looks good.  Both lines created by the shroud/wing joints appear even and go in similar directions when looking from a distance.  The near side looks good.  The off side is not good.  The wing looks too short and possibly is.  Also, the rear of the shroud that is in effect the cockpit edge is out from the door edge by about 1 to 1.5cm.  The area just looks wrong.  On looking round for other potential causes for concern I notice that the shocks appear different.  I remove them and when I place them on the work bench it is obvious that they are not the same.


I consult with John, once again and get the impression that one of them is probably from an MGB.  I am off to see him again on Sunday to rectify this issue.  It does mean though that I am unable to proceed with the car for the time being.  So I turn to the engine.

Whilst on holiday I discover that it is generally the done thing to carry out a modification to the rear oil seal carrier when engines are refurbished.  I am not sure if this has been done to my engine so I need to get to the area in question by removing the clutch cover and plate.  Once done the flywheel was removed and I took a picture to post to the forum (AHEXP.COM) to establish if the engine has had the treatment.


Thursday, 28 July 2016

I write this in sunny France.  I kid you not, my wife and I are doing a house swap in Aix-en-Provence for 4.5 weeks.  It is lovely.  The people whose house we are living in are going to drive to England and stay in our place in London.  They haven't left yet which could be odd but it is isn't.  Catherine is visiting family in Corsica and Alain is working deep in the bowls of the house.  We are living in an annex which is quite separate to their main living quarters.  Essentially my life consists of eating bread, cheese, meat and drinking coffee & beer whilst reading.  It's a hard life in the sunshine.

So why am I writing this you may ask?  Well my wife met me in Nice on the south coast of France, a long story which I will skip for now.  I drove the TT down from London at the weekend.  It should have been a very chilled drive, roof down, sunshine, empty roads (they really are empty in France) and nothing to worry about apart from 6 weeks off work.  However, the French customs officers had a strop on following Brexit and terror attacks so kept me (and everyone else) waiting 4 hours extra to get through the port at Dover.  This meant that I had 600km to do to get to the booked hotel and I wasn't starting out from Calais until gone 16:00.  Now the French have a rather generous speed limit of 130km/h but in the interests of a Saturday night I sat at 150 all the way.

After about 300km I noticed the familiar sight of a Healey 100.  I also realised that I wasn't catching it very rapidly.  When I did catch it I realised that it was going about 110km/h with two people in it which seemed very fast.  I couldn't help myself and leant out of my car and waved like mad at them.  The lady driving had a very cool scarf on and the two of them had an intercom of some description.  They looked very cool and very happy.

I did later see two French Healeys in a service station but no more on the road.

It was fun.


Sunday, 19 June 2016

Well it is fair to say that I have been a little laid back on the car front lately.  Mainly due to the intensity of the end of year push that every teacher experiences in the run up to the GCSE exams and the half Ironman in Staffordshire last weekend.  Well the exams are over and the Ironman completed so the car has slipped back into focus.  I tided up the edges on the bulkhead top panel that I removed last time and sat it back on the car.  I then fitted the shroud and established that I can move it around a little so I bolted the wings on along with the wheels and take it out of the garage to have a god look from a distance.

The shroud sits in a different position now; the lower front edge looks more evenly spaced between the chassis legs and the same is true of the bonnet aperture and the bonnet mounting brackets.  That is all good.  The wheels look better, the nearside still sits further out than the offside  but not by much and I suspect that when I address the shroud it could well take care of that, still all good.  The issue is that the offside wing is now a little too short, not good at all:


The wing is now 1 inch shorter that the shroud


This is going to take some pondering as I don't want to make a whole lot of changes to the wings and then discover that I need to do it all over again at some later stage.  Essentially, the top panel is sitting on the bulkhead at an angle so there are potential issues everywhere I look at from lining up the aluminium cockpit trims that sit on the shrouds and doors to the position of the dash panel.  Fundamentally though it looks healthier so I am happy with the development, I just need to think far and wide on the implications.


Sunday, 22 May 2016


So after a period of lots of intense procrastination I finally made it back into the garage.  This isn't actually the truth, I have been in the garage lots but I have been working on anything but the Healey as I can't work out what to do with the misaligned front end. So with all my excuses used up I get back to it.

Easy start, welding the front chassis section back on that supports the shroud and radiator.


I go through the rigmarole of measuring everything again to see if it is out of line and decide that I need to do something about the bulkhead and specifically the top panel, like cut if off.  So I did.
Now obviously I have yet to put it back so I am well aware that I have done the easy part but it still felt positive.  Next week is half term and I am hoping that I can get a bit of time on the car.


Saturday, 23 April 2016

Equipped with the porta-power I unlocked the garage door and got busy.  It didn't really hit the spot though.  I managed to push the scuttle back but it didn't have much effect on the positioning of the shroud.  I started measuring again and felt a little perplexed as the scuttle is pretty square to the main chassis rails.  This is a puzzle.  I took the shroud out side to get a long distance view:


It looks anything but correct.  The photo above shows the worst of the two worries.  One is that the bonnet aperture isn't great, it looks like the righthand side front edge drops too much.  Two, the righthand section of the shroud that the wing mounts onto looks compressed.  It was hard to make any meaningful conclusions though as the thing looked different every time it was moved.  I feel a little frustrated though as I paid a professional to sort out both shrouds and he assured me that they had both been put on a jig and sorted; clearly they hadn't been.  I decided to give it a break for the day and come back to it later on.

I did however notice that I hadn't put the front cross brace section on that well and so took it off again.  I have a distant memory of doing this before,....


Sunday, 3 April 2016

I had made arrangements to borrow the porta-power from my panel beater friend but when he called I was eating Easter Sunday lunch so I ignored the call.  I sent him a text but he's not great with texts so I never heard back from him.  I know he was planning to go away over the holidays so I didn't call him on bank holiday Monday, instead I headed for the garage and decided I should find something else to do.  This proved harder than I thought it might do.  I ended up renovating some bits that I am in no rush for:  Pedals, pedal bar spacer, clutch linkages, anti-roll bar and mounting brackets.  Why, well they were clearly visible and in need of a refresh.

It was quiet enjoyable work but I was struck by the length of time it took me to get it all done, coated with POR15 pre-paint metal ready and then painted.  It took the whole day.  I used a variety of wire wheels to get the bulk of the paint and rust off then dug the sand blast cabinet out to finish off the places that were hard to get to.  I tried a few things with the sand blast cabinet that I had not done before, initially I replaced the fine sand/grit with the medium stuff that I had bought some time ago and this made a massive difference.  I could almost see what was happening in the cabinet and it actually worked.  The second thing I tried was to put the compressor outside so that it didn't inhale the fine dust that filled the garage; it still lives to this days.  

Anyway, I had a lovely day procrastinating in style and ended up with some lovely shiny bits:

Pedals ready for painting


And then painted:


Sunday, 27 March 2016

Good Friday meant a return to the garage after a while away due to a combination of factors: March is a busy time for teachers as there is enough time to make changes for final year students and for those changes to make a difference, my wife and I celebrated our anniversary with a lovely weekend in Nice, I actually did some cycling and that takes time and basically I was a little cheesed off after the last session where my fears on the position of the front bulkhead came to life.  Anyway, a few weeks away and I returned with fresh energy and optimism.  I realised that I had quite missed the place and the car.  During my discussions with my panel-beater friend he was clear that the first thing to do way to put the axel back in and take measurements to check that the chassis is aligned correctly.  He said that if that was good then the body issues could be attacked with confidence that the finished car will be good to drive.  So, back to the axel then:  

Step 1: rear springs.  These went in amazingly easy compared to the first time I fitted them and made me feel happy to be back working on the car.


Step 2: fit the axel.  Blimey the thing is heavy.  It took a lot of energy to get it out of its long term resting place, unwrapped and moved to the other side of the garage, a mere 8-10 feet away.


I decided that I needed to take little steps and have regular rest so I used the excuse of needing lots of photos to provide the rest, lousy excuse for being leisurely I know but I took it all the same.


Once the axel was in I sat down and had a coffee, you can't possibly know how much effort that took a pen pusher to do unless you've done it yourself.  Now on to the tricky bit, getting bolted up.  Since I last fitted the axel I had extended the pins in the leaf springs that the axel sits on and it certainly made life easier to locate the axel.  Maybe it was better because the springs had been fitted before but easier it was.  Last time I had my wife and her friend, the big South African cyclist/runner on top of the car as ballast but this time I managed to get it done without much fanfare on my own.


Once nicely bolted up I took a look at the front again.  My panel-beater friend had noticed that one side of the front wishbone sat lower than the other and I soon realised that offending side was fowling on the chassis.  So I removed the wishbone and removed the metal on the chassis that the wishbone was catching on and re-fitted it all and hey presto both sides had a full range of movement.


Step 3: take measurement and hope.

Now the day was good anyway (not working on a Friday must be good, right?) but it got a whole lot better with the tape measure in my hand.  Every measurement I took from front to back was millimetre perfect.  I closed the garage door and collapsed into the bath to sooth my old back which was (and still is) grumbling about the axel fitting.

On to the bodywork.  Before I left the garage I took measurements from everywhere and no clear picture could be ascertained but after lots of pondering I concluded that the top of the bulkhead where the shroud mounts was a few millimetres further back on one side.  I don't think the shroud needs to be moved much at the back to have quite a significant movement at the front because of the length of it.  However, I am going to have to do something about it without having too much of an impact on the position of the A posts and therefore door gaps etc.  I am also reluctant to undo all of the welding I have done to the A posts and the bottom of the bulkhead / sill area because it will make a mess even though I have generally just tack welded everything to date.  I am resigned to having to revisit the door gaps though and everything that comes with it, oh well I signed up for a challenge and boy have I got one.